Easy Tree Drawing: Pine, Palm and Christmas Tree Tutorials
Easy tree drawing in 8 steps. Learn how to draw a pine tree, palm tree and Christmas tree with pencil steps and color. Great for beginners.
Tip: Click open high-res plate to view close-up strokes, line variations, and pencil guide erasures.
Tree drawing is easy once you know the basic shapes. A tree is a trunk plus leaves, and you can change the leaves to make a pine tree, a palm tree or a Christmas tree. Use the 8 steps below, then choose your favorite style.
What You Need
A pencil, an eraser, paper and colors. Estimated Time: 5-10 minutes.
How to Draw a Tree Step by Step
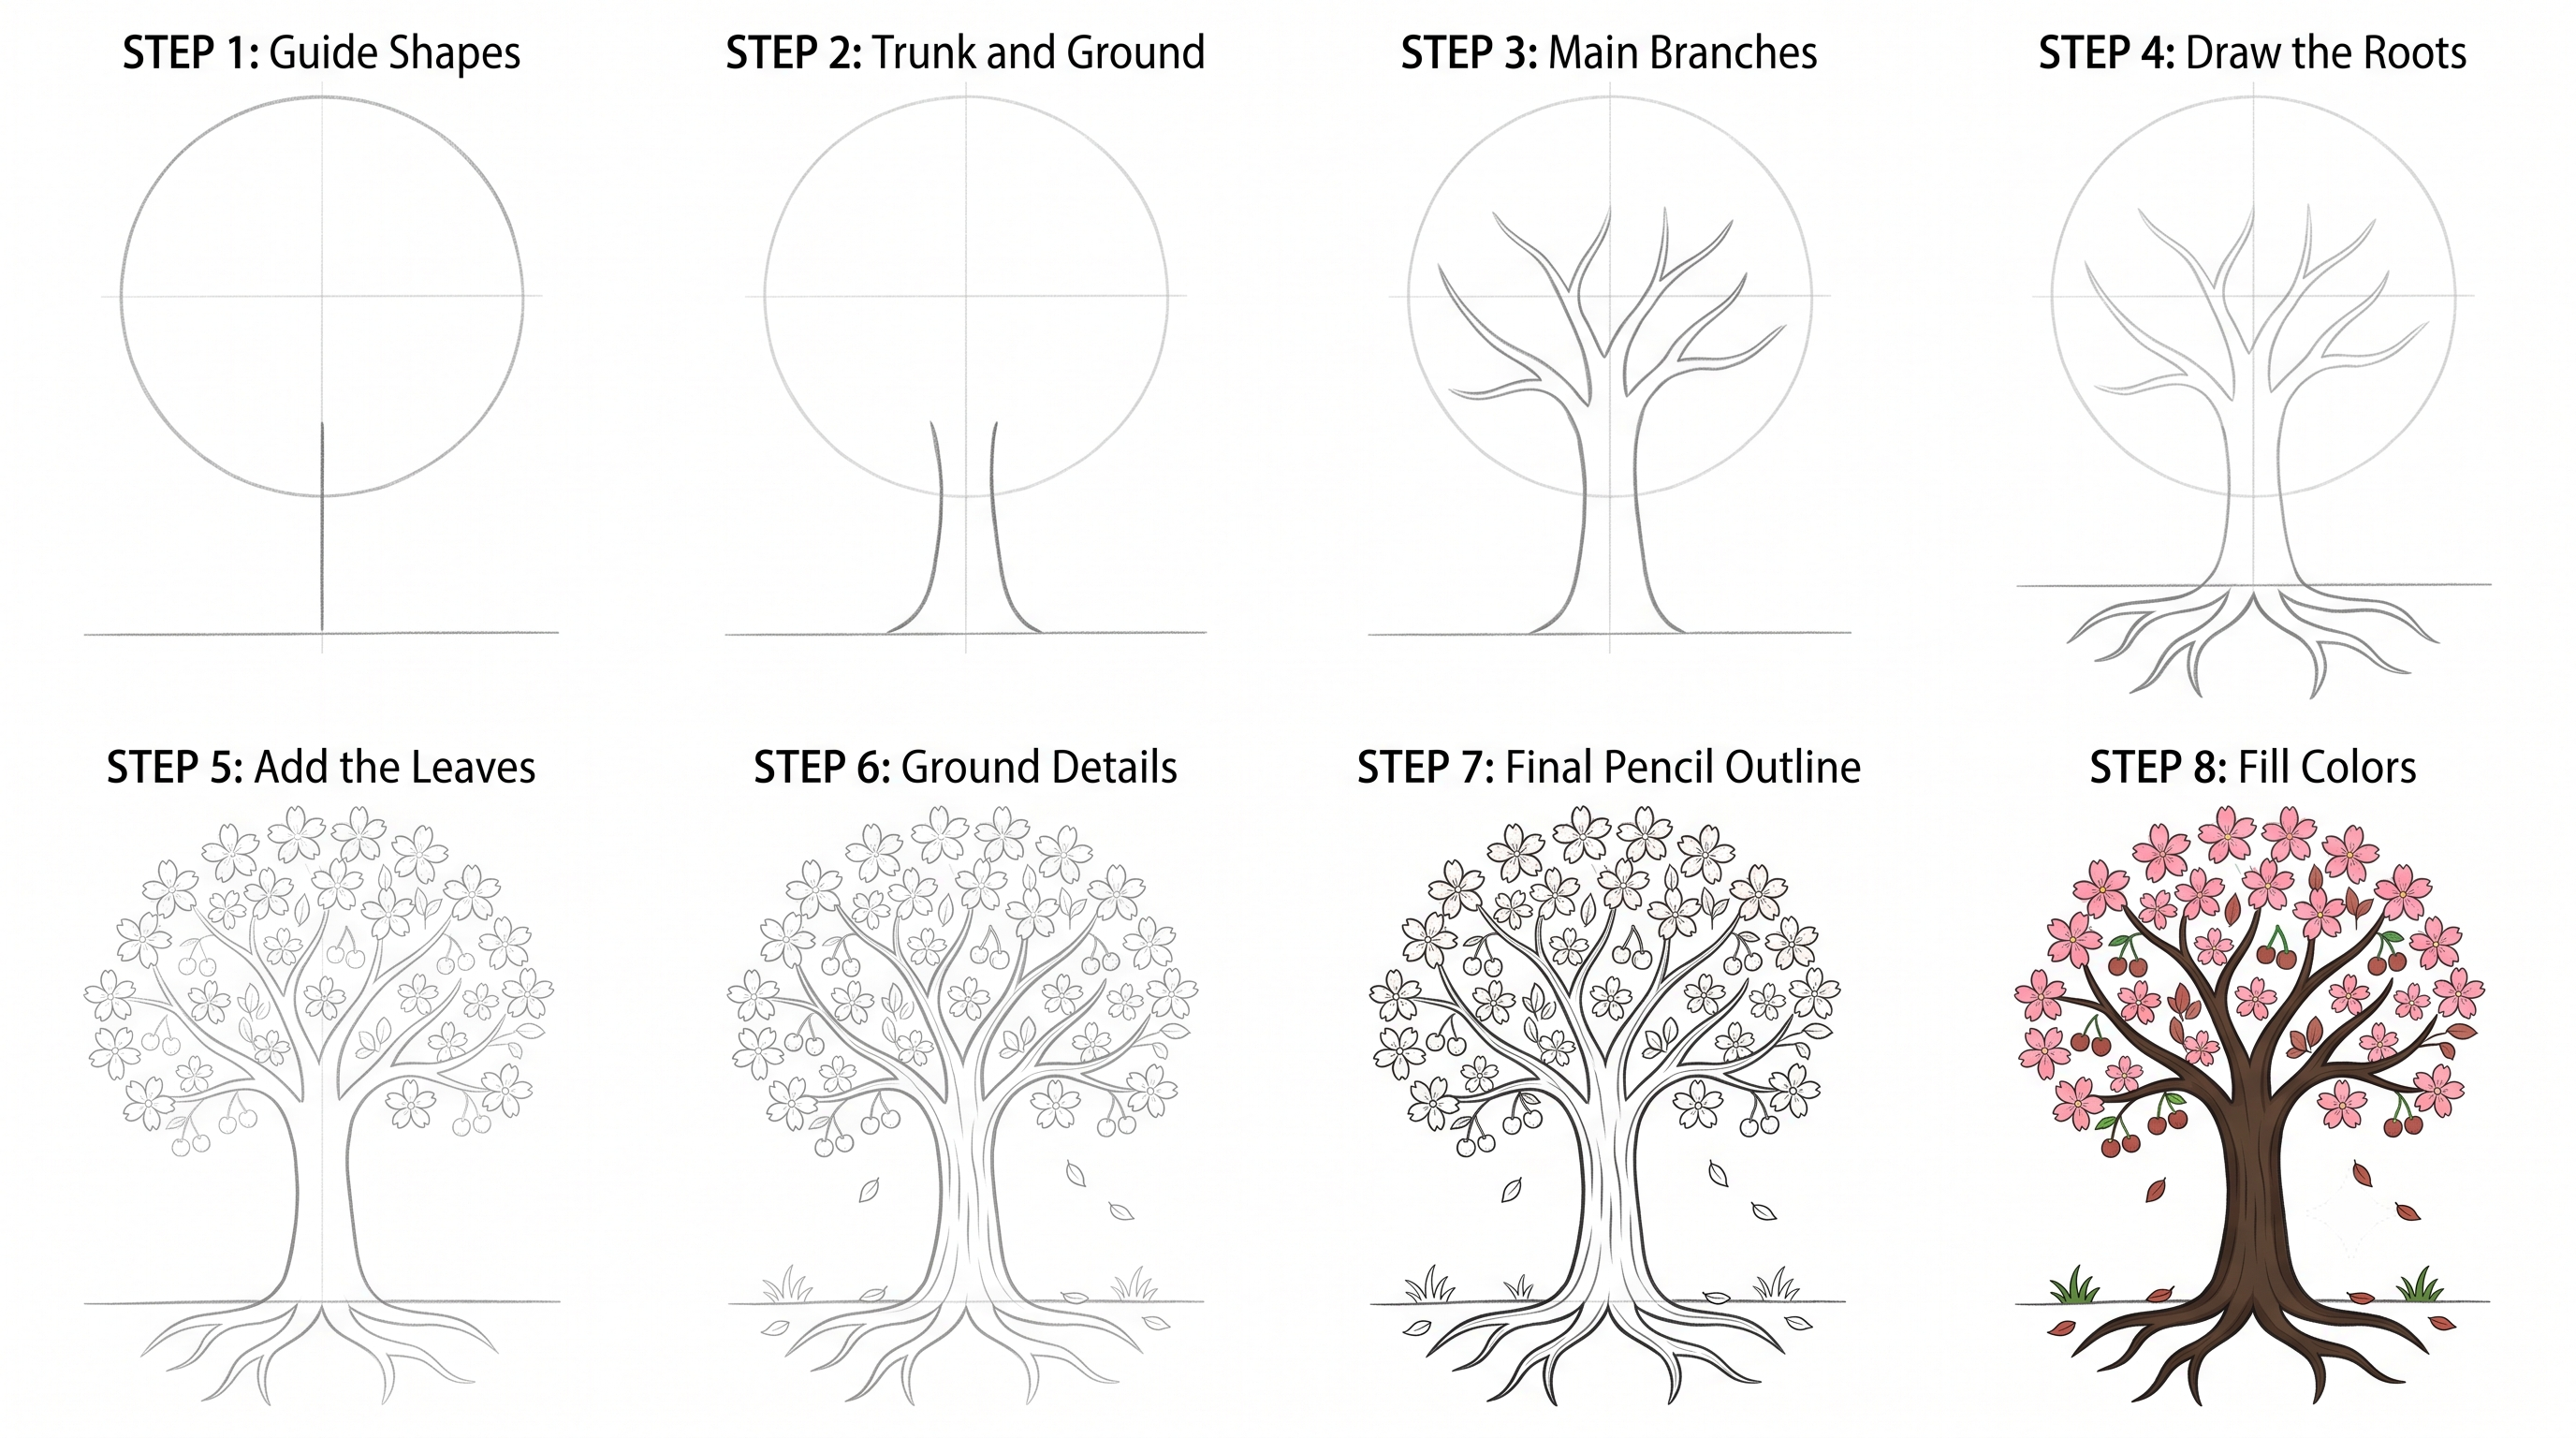
- Draw a tall trunk with two straight or slightly curved lines.
- Add small roots at the bottom.
- Draw two or three main branches at the top.
- Add the leaf shape at the top (see styles below).
- Add more leaves or layers to fill out the tree.
- Draw bark lines on the trunk and details on the leaves.
- Trace your final lines and erase the guides.
- Color the trunk brown and the leaves green.
Choose Your Tree Style
- Pine tree drawing: stack three or four triangles on top of each other, getting wider toward the bottom.
- Palm tree drawing: draw a curved trunk and add long, curved leaves spreading out from the top.
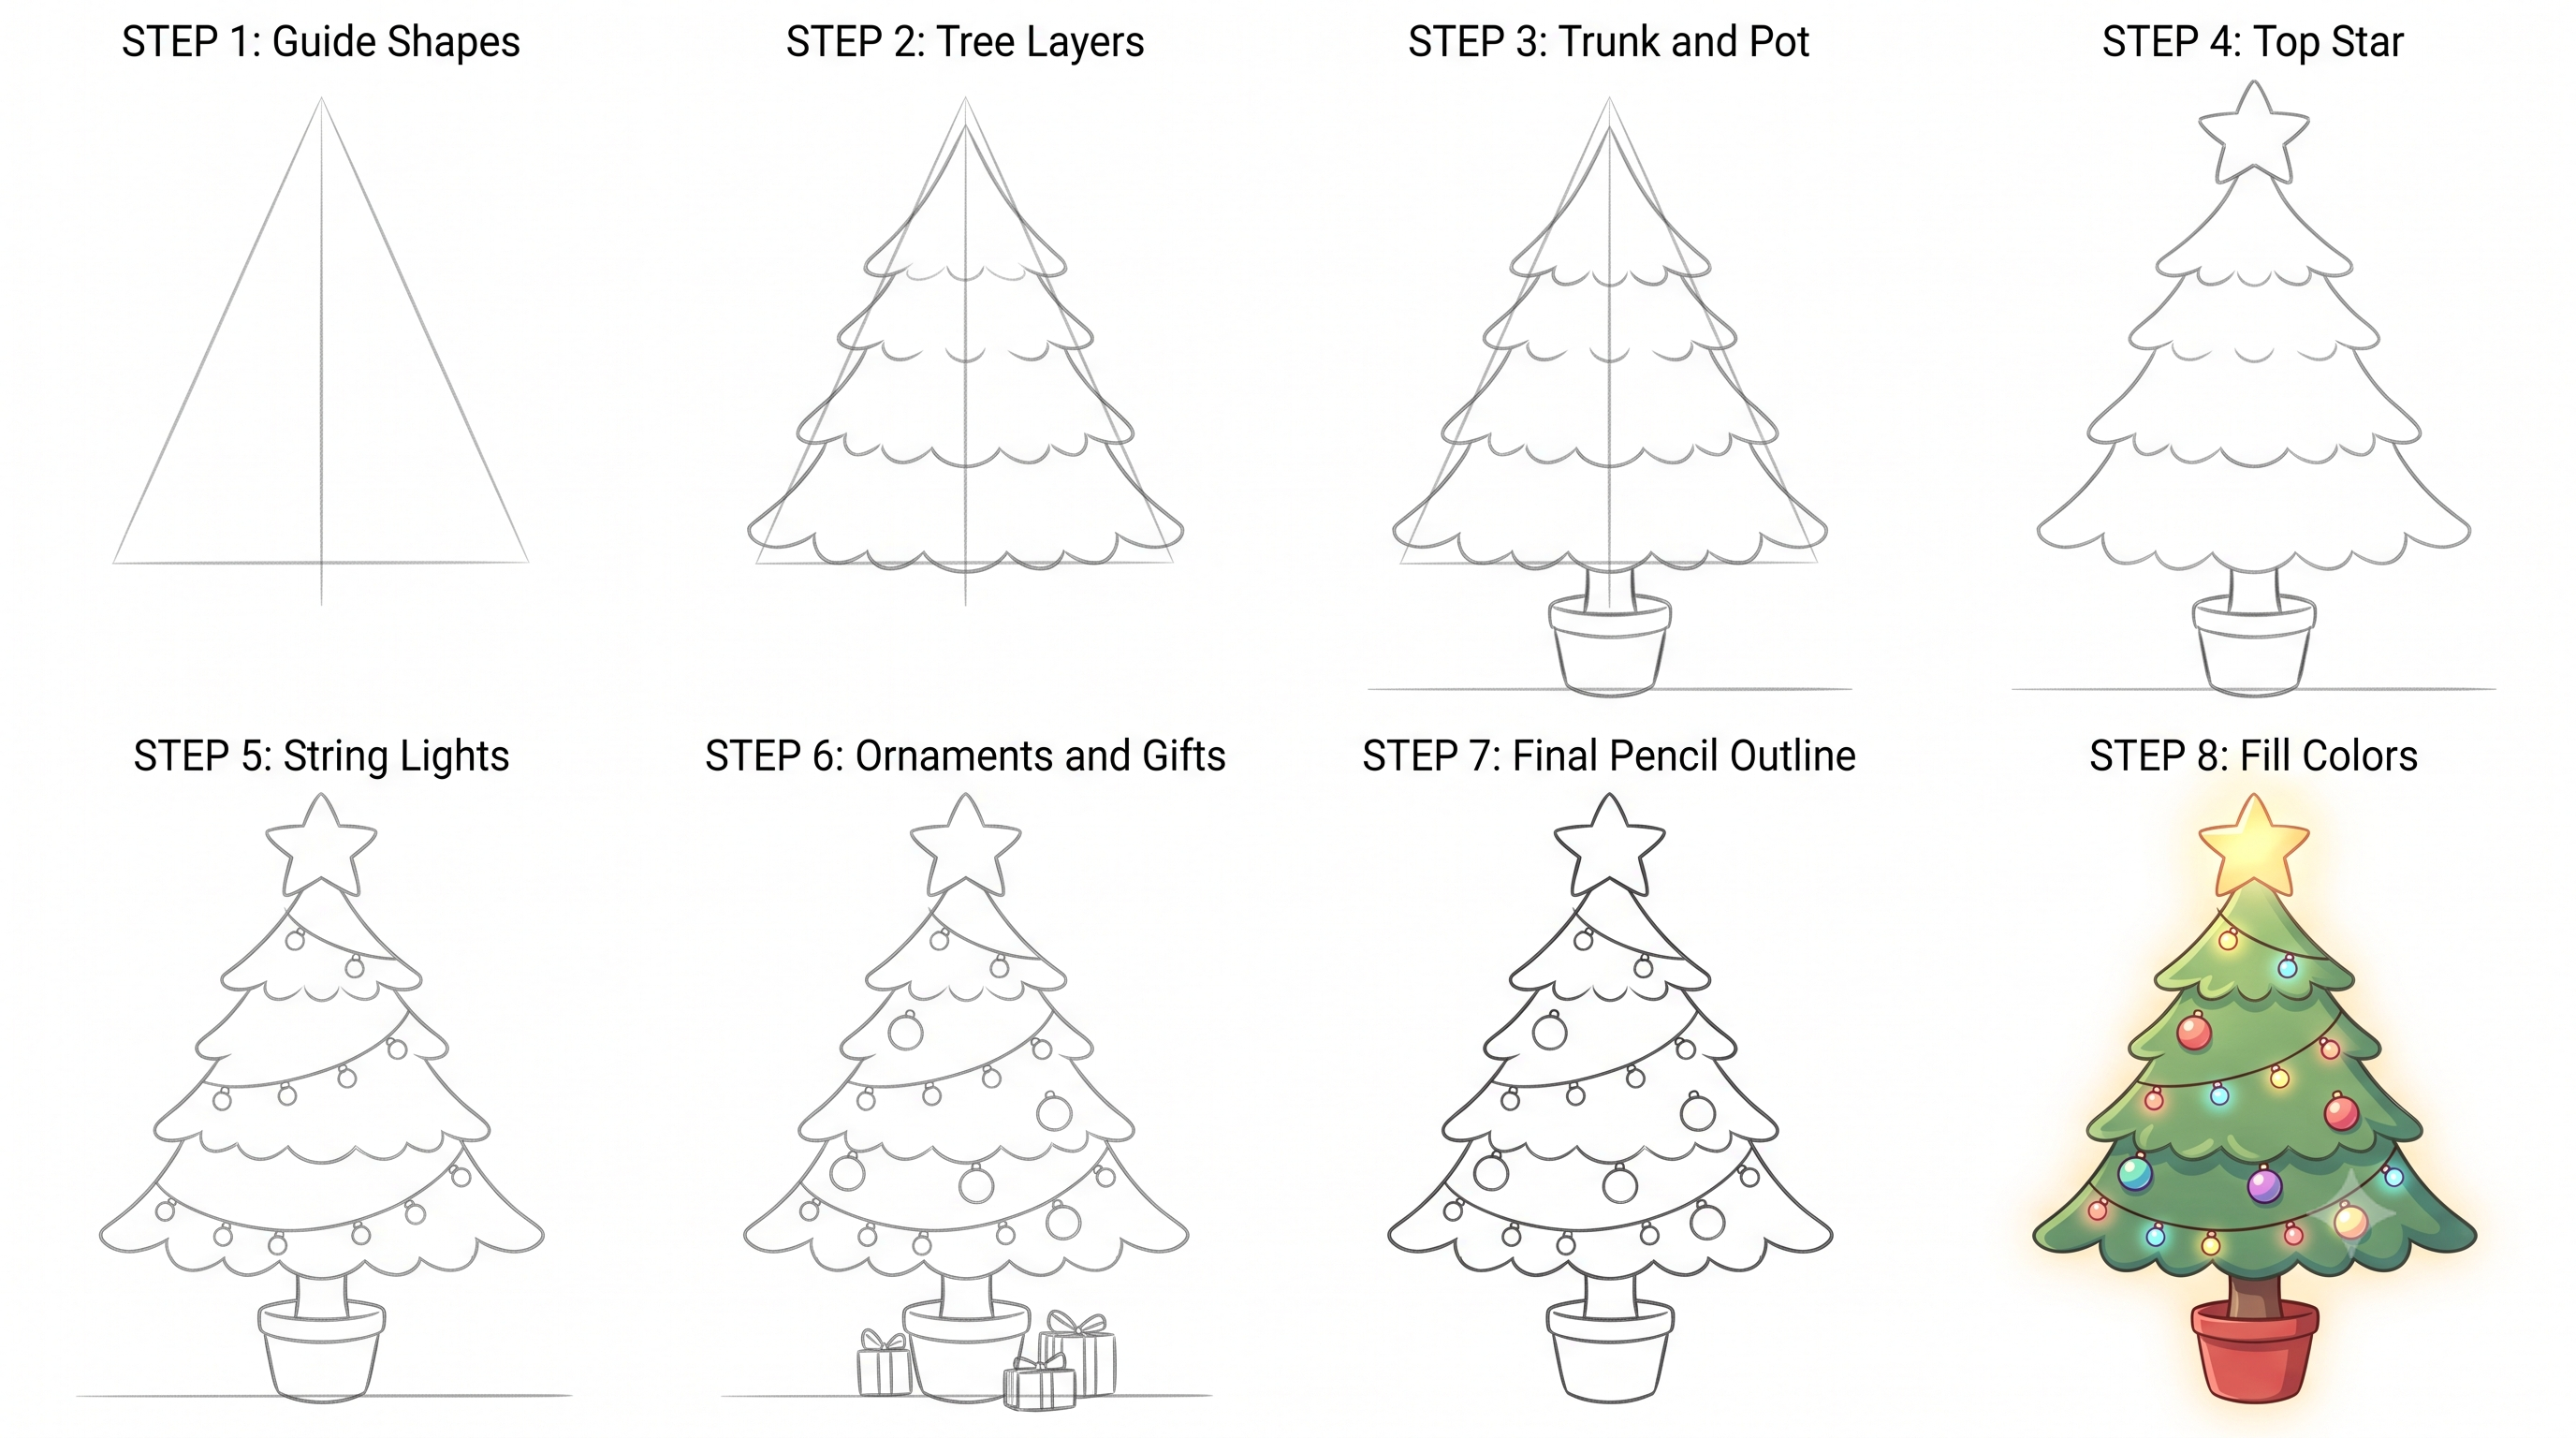
- Christmas tree drawing: draw a pine tree, then add a star on top, round ornaments and a string of lights. Color it green with red and gold decorations.
Tree Drawing Tips
- Make the trunk a little wider at the bottom.
- Overlap the triangles on a pine tree so it looks full.
- Use two shades of green for a more realistic look.
FAQ
How do I draw a tree easy? Draw a trunk first, then add branches and a leafy top.
How do I draw a Christmas tree? Draw triangle layers, then add a star and ornaments.
What is the easiest tree to draw? The pine tree, because it is only stacked triangles.
Step-by-Step Instructions
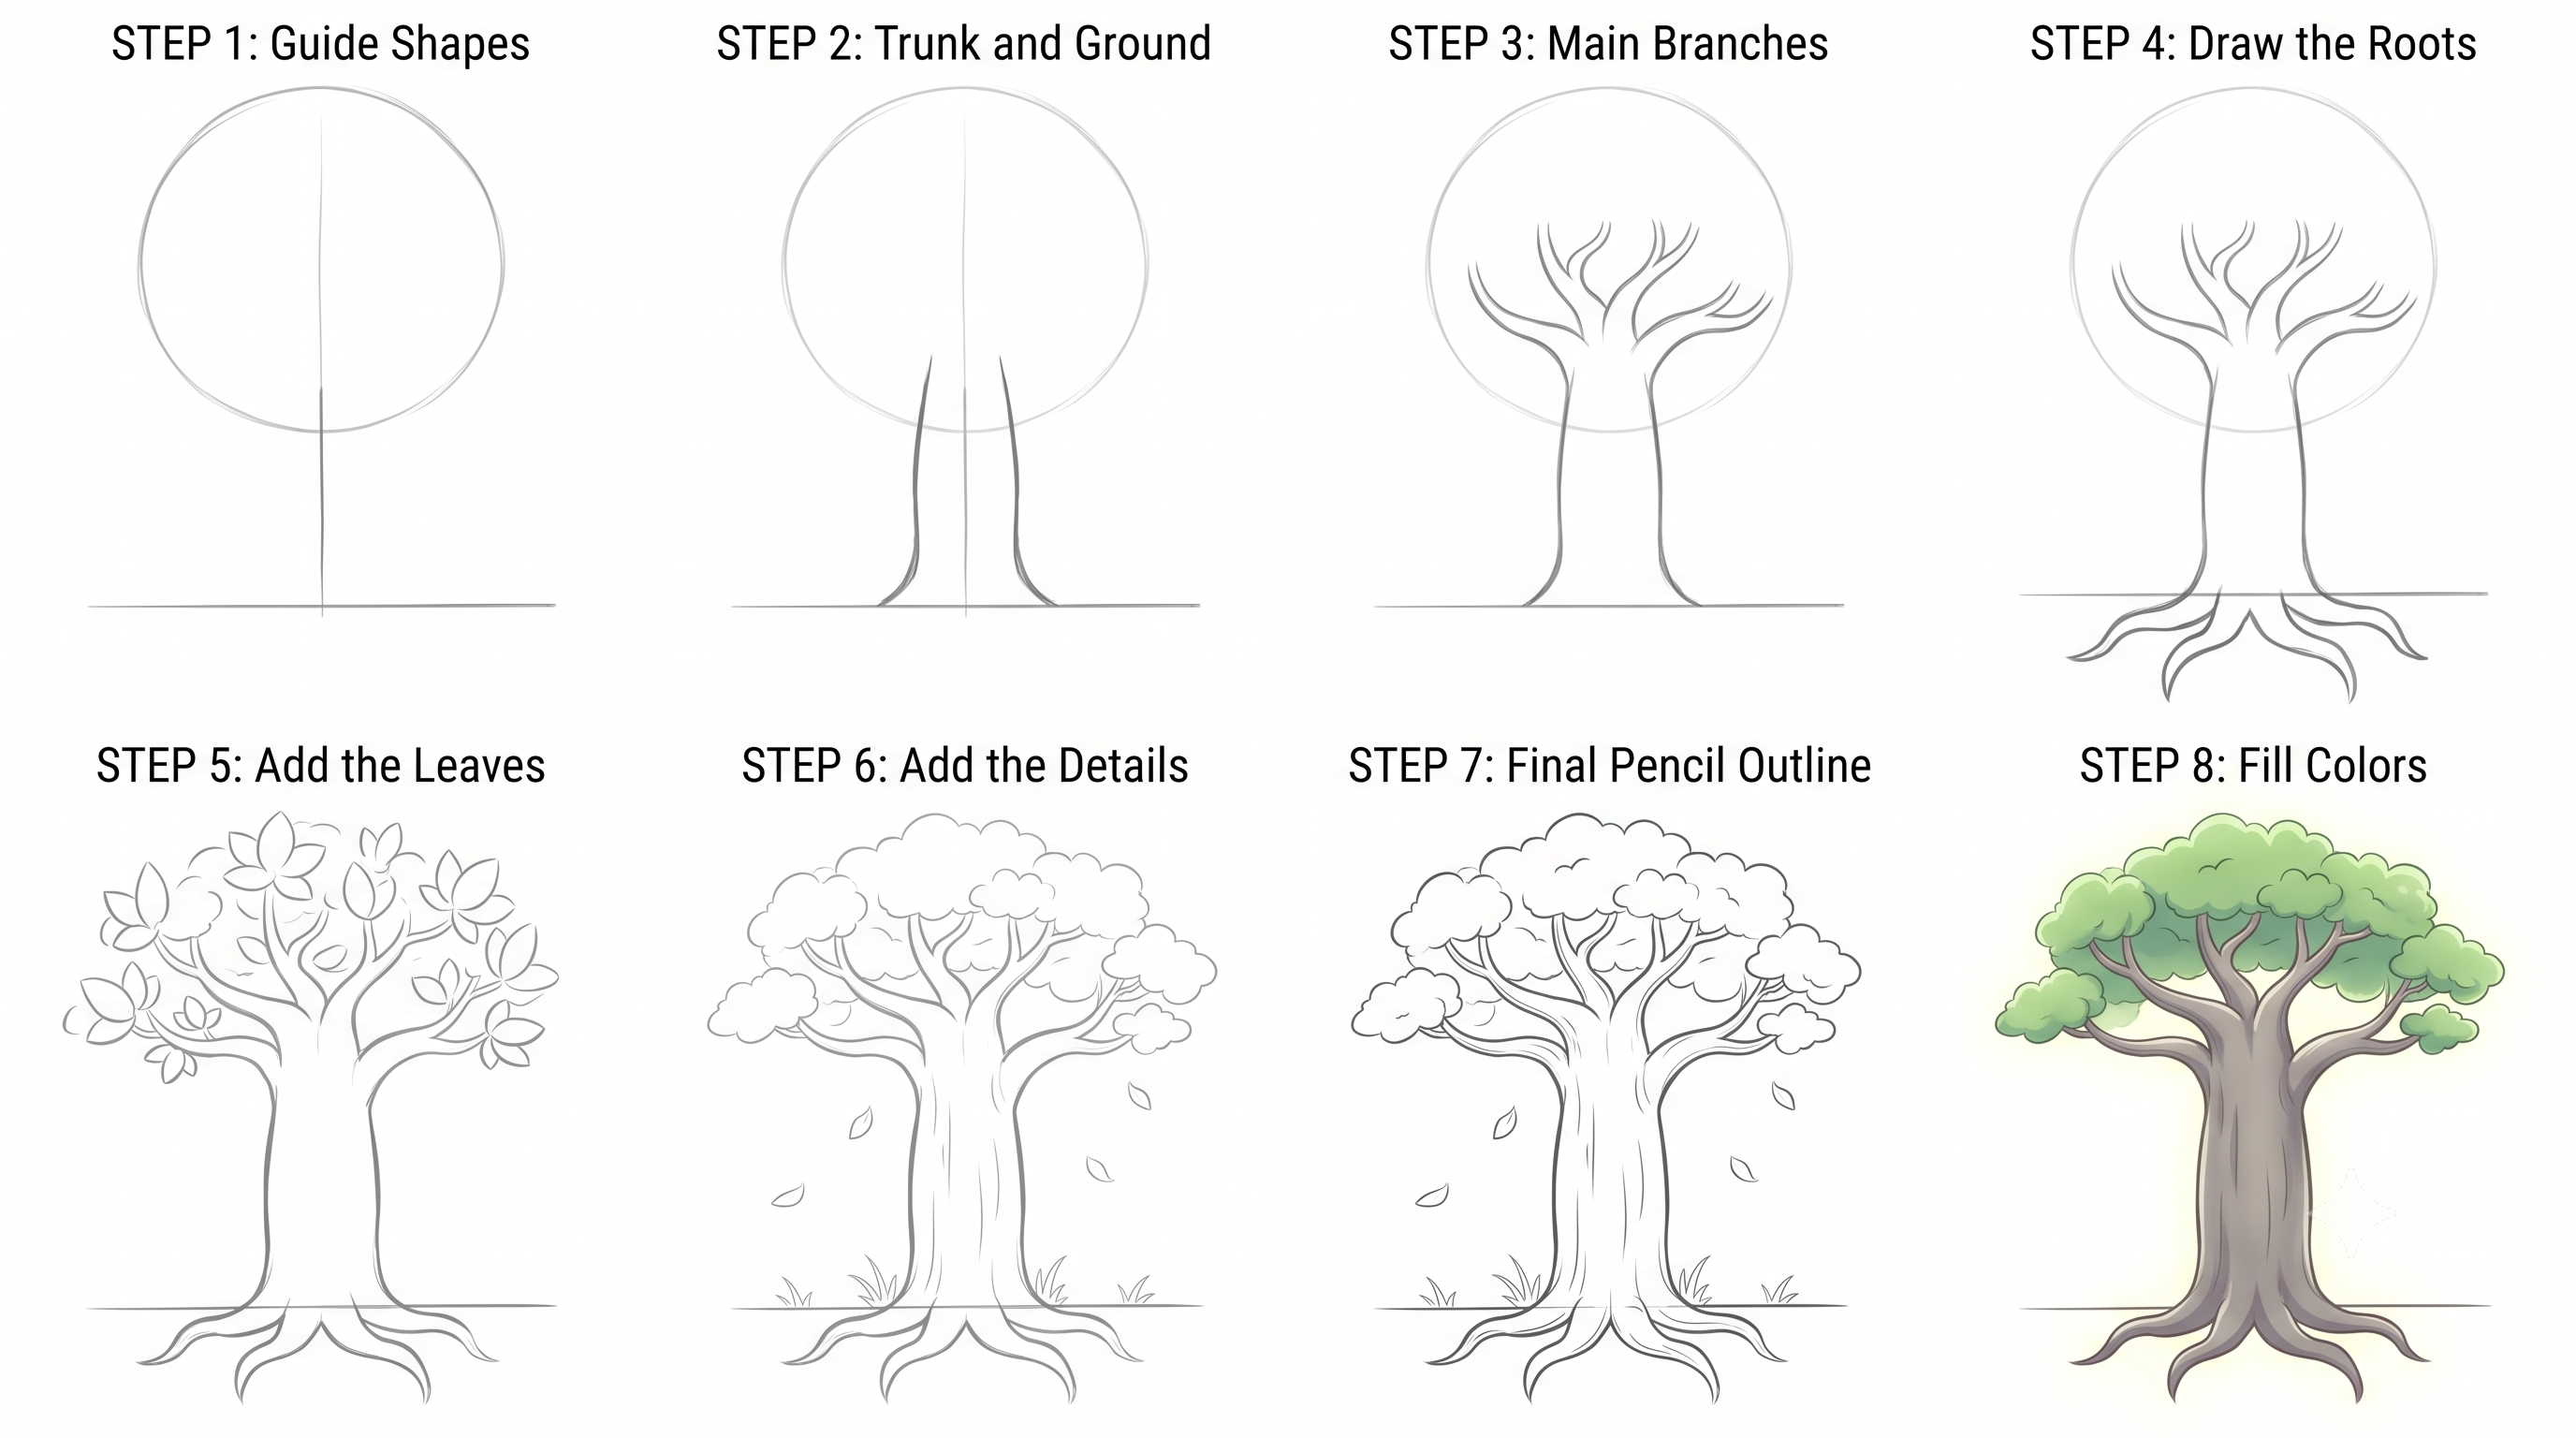
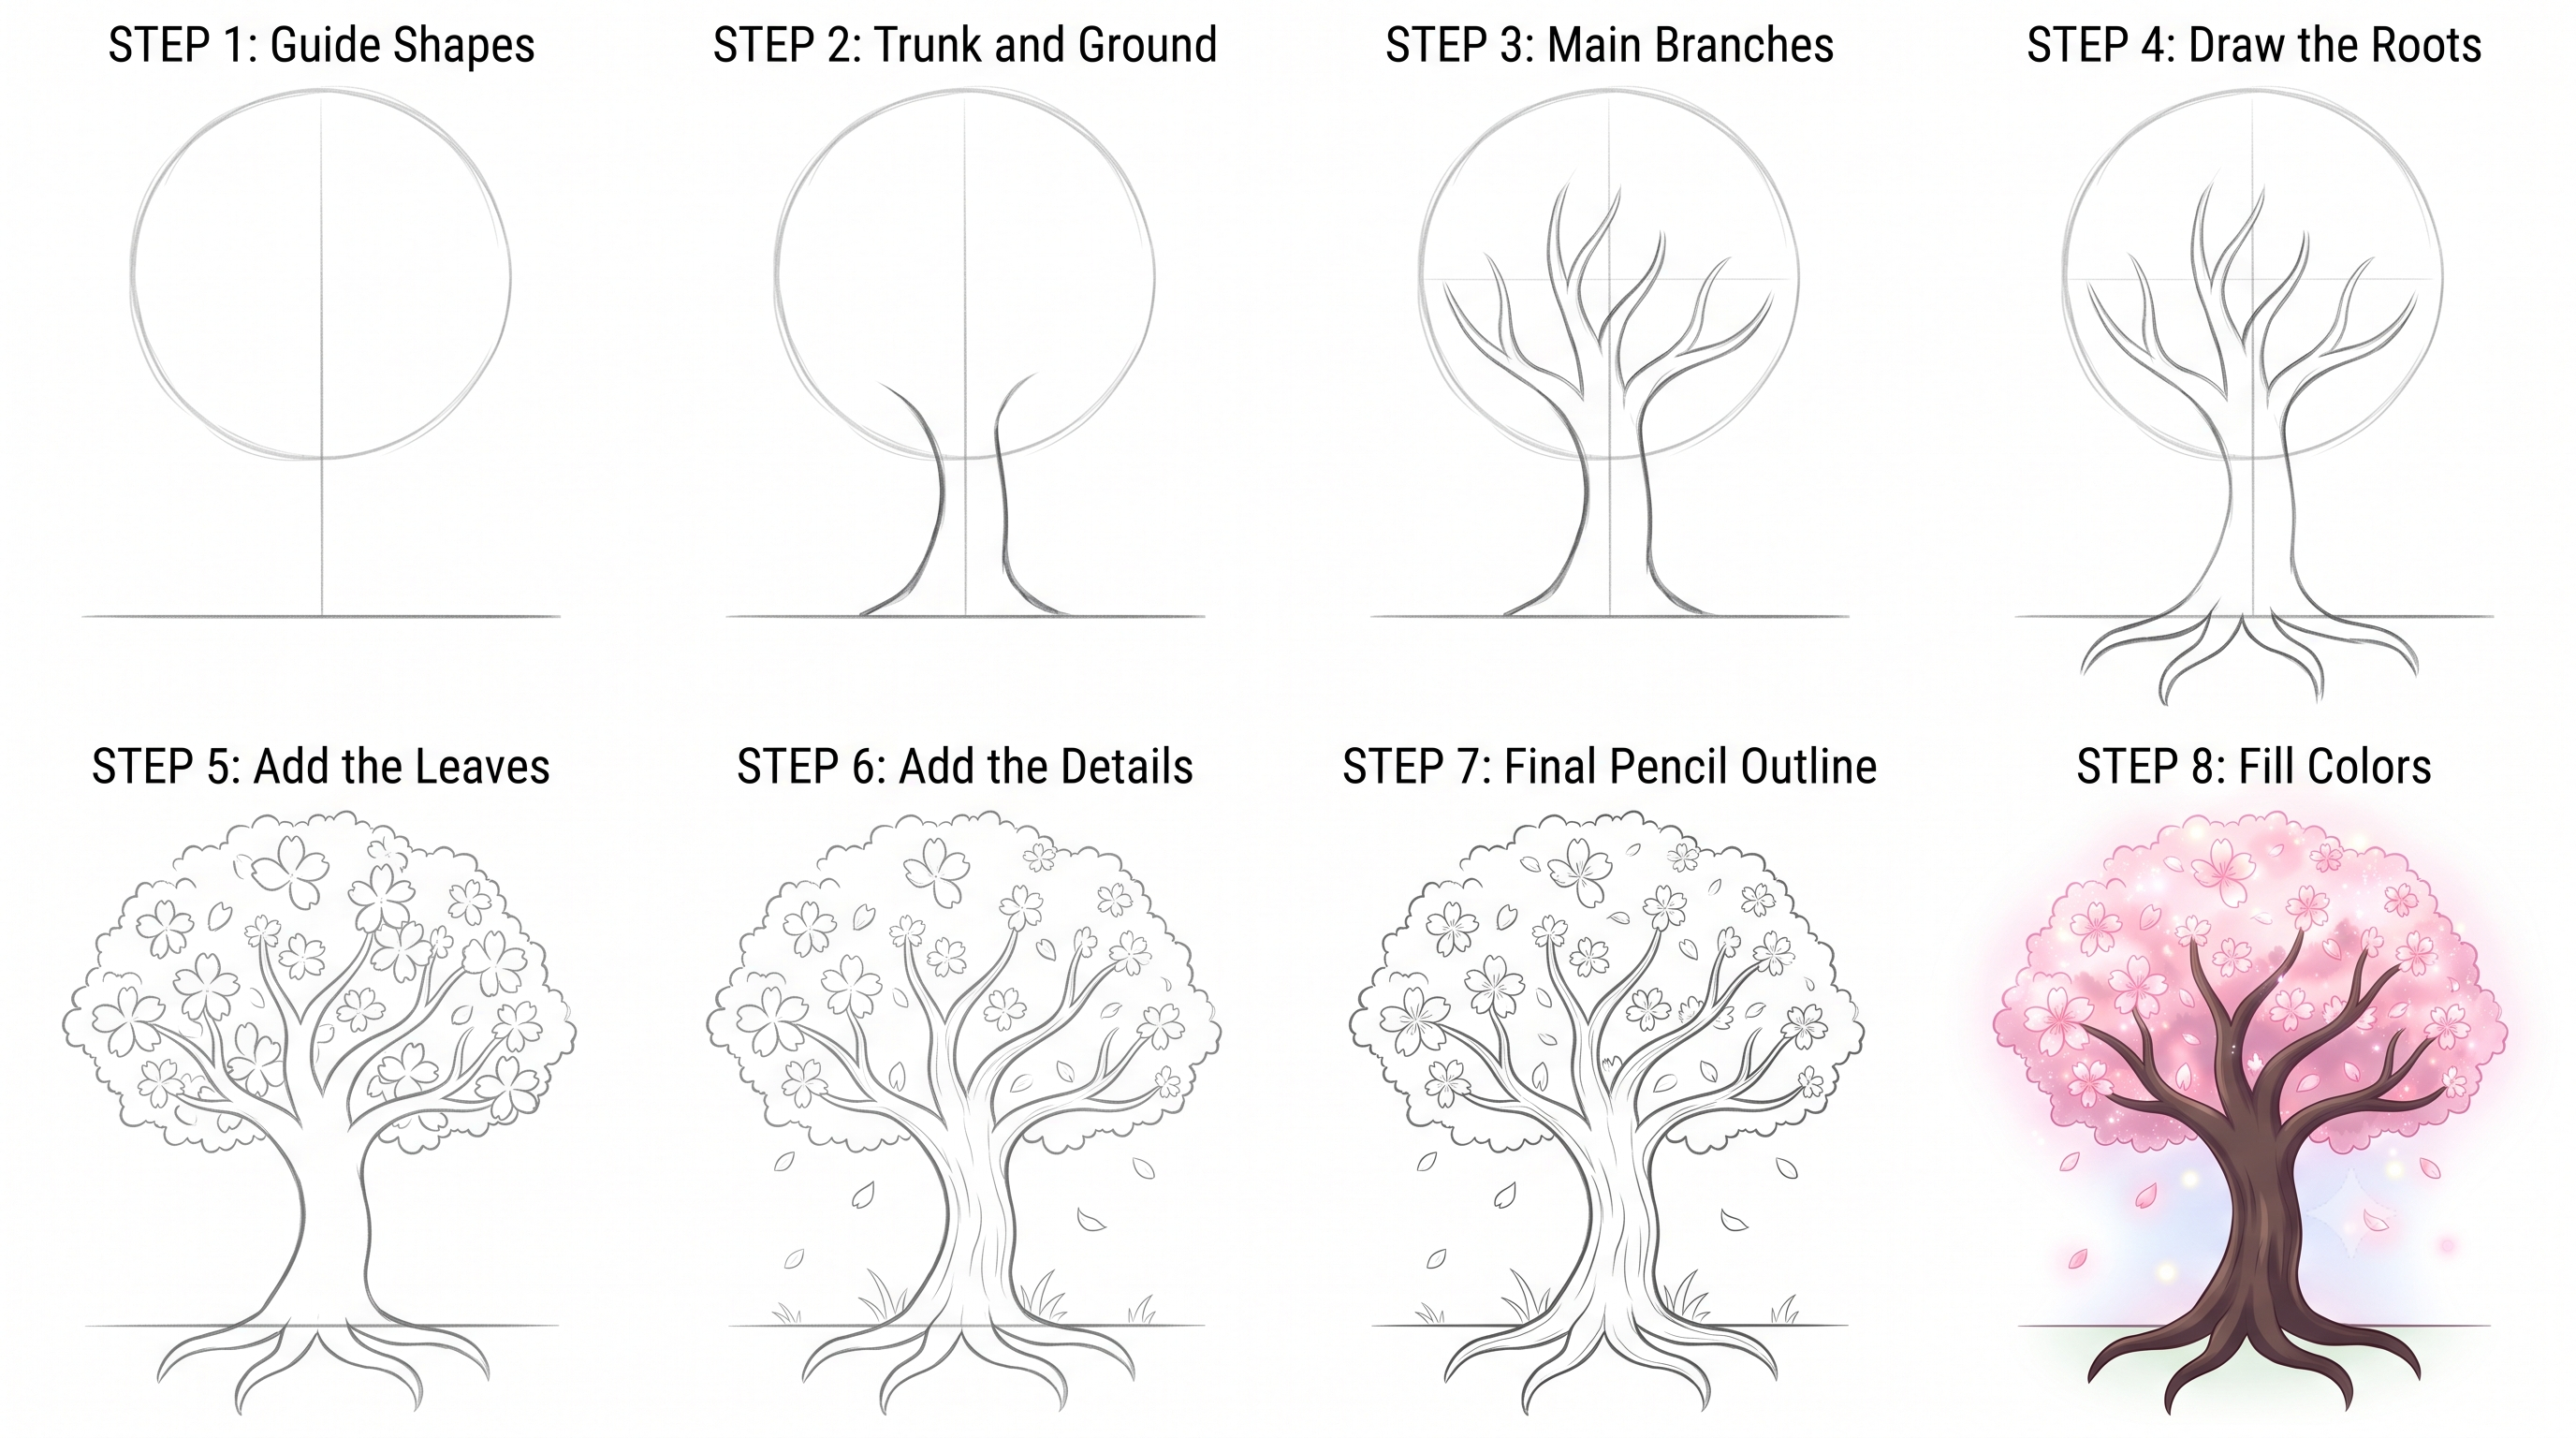
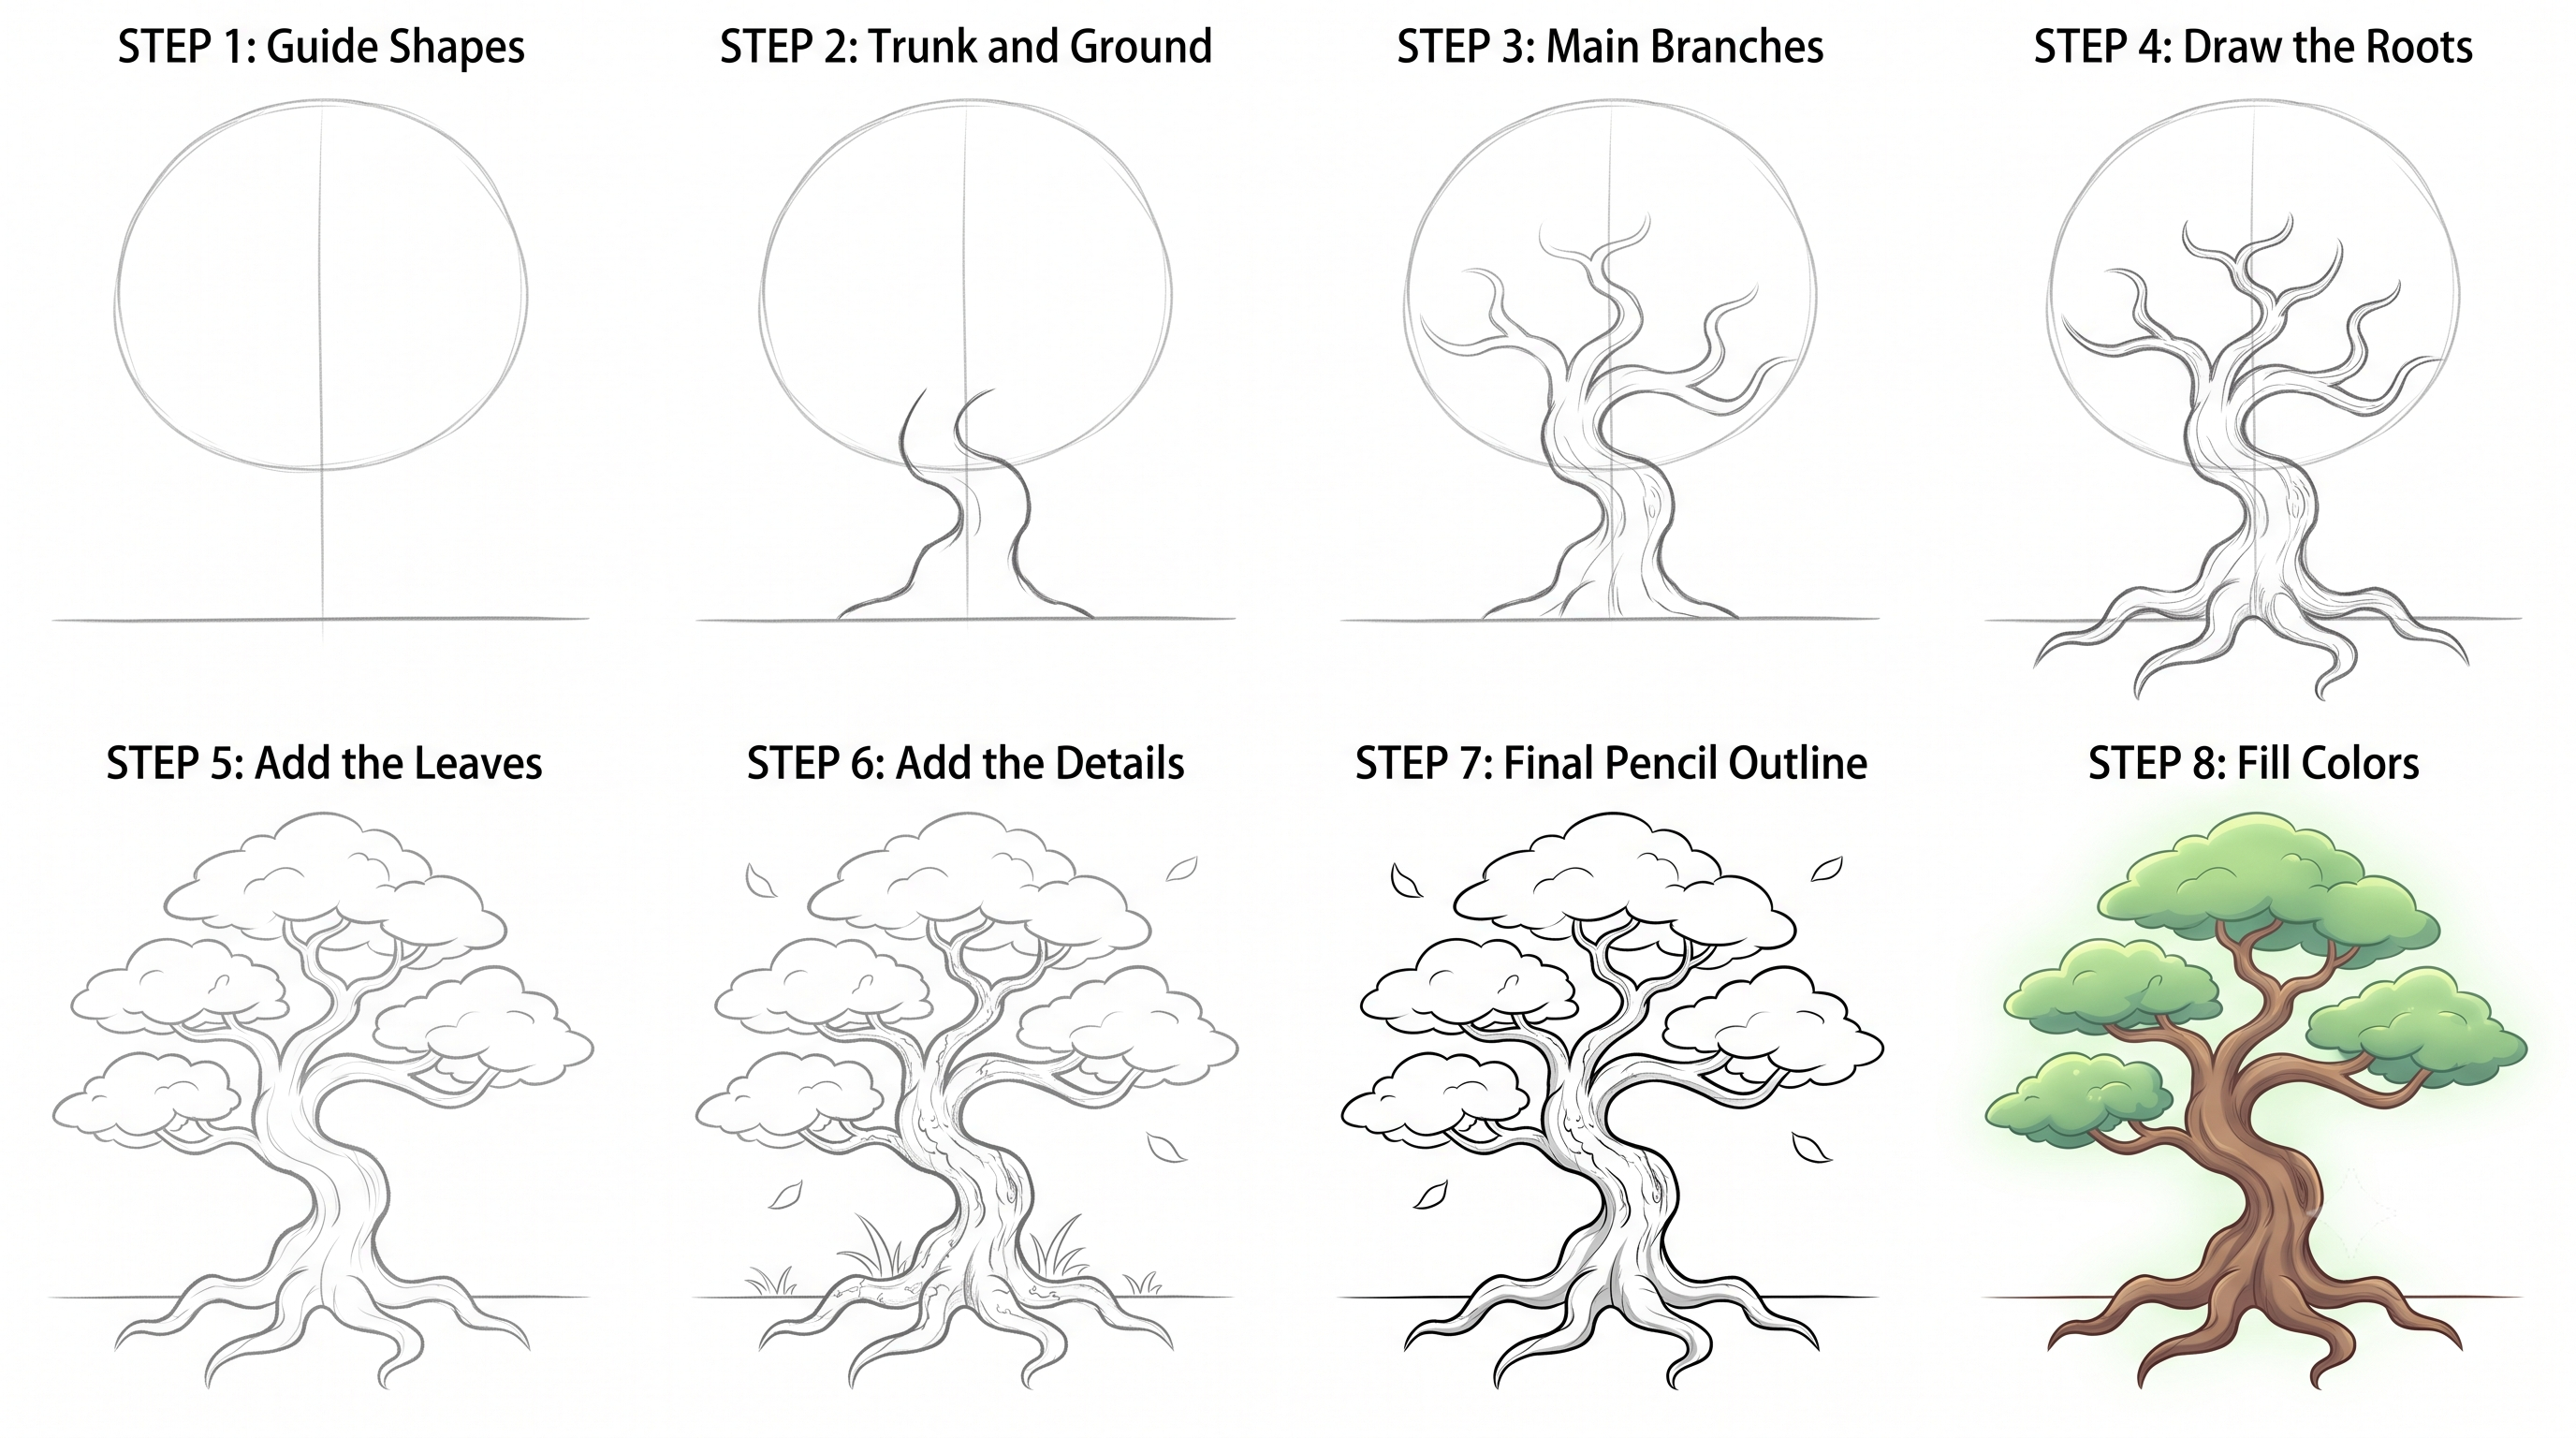
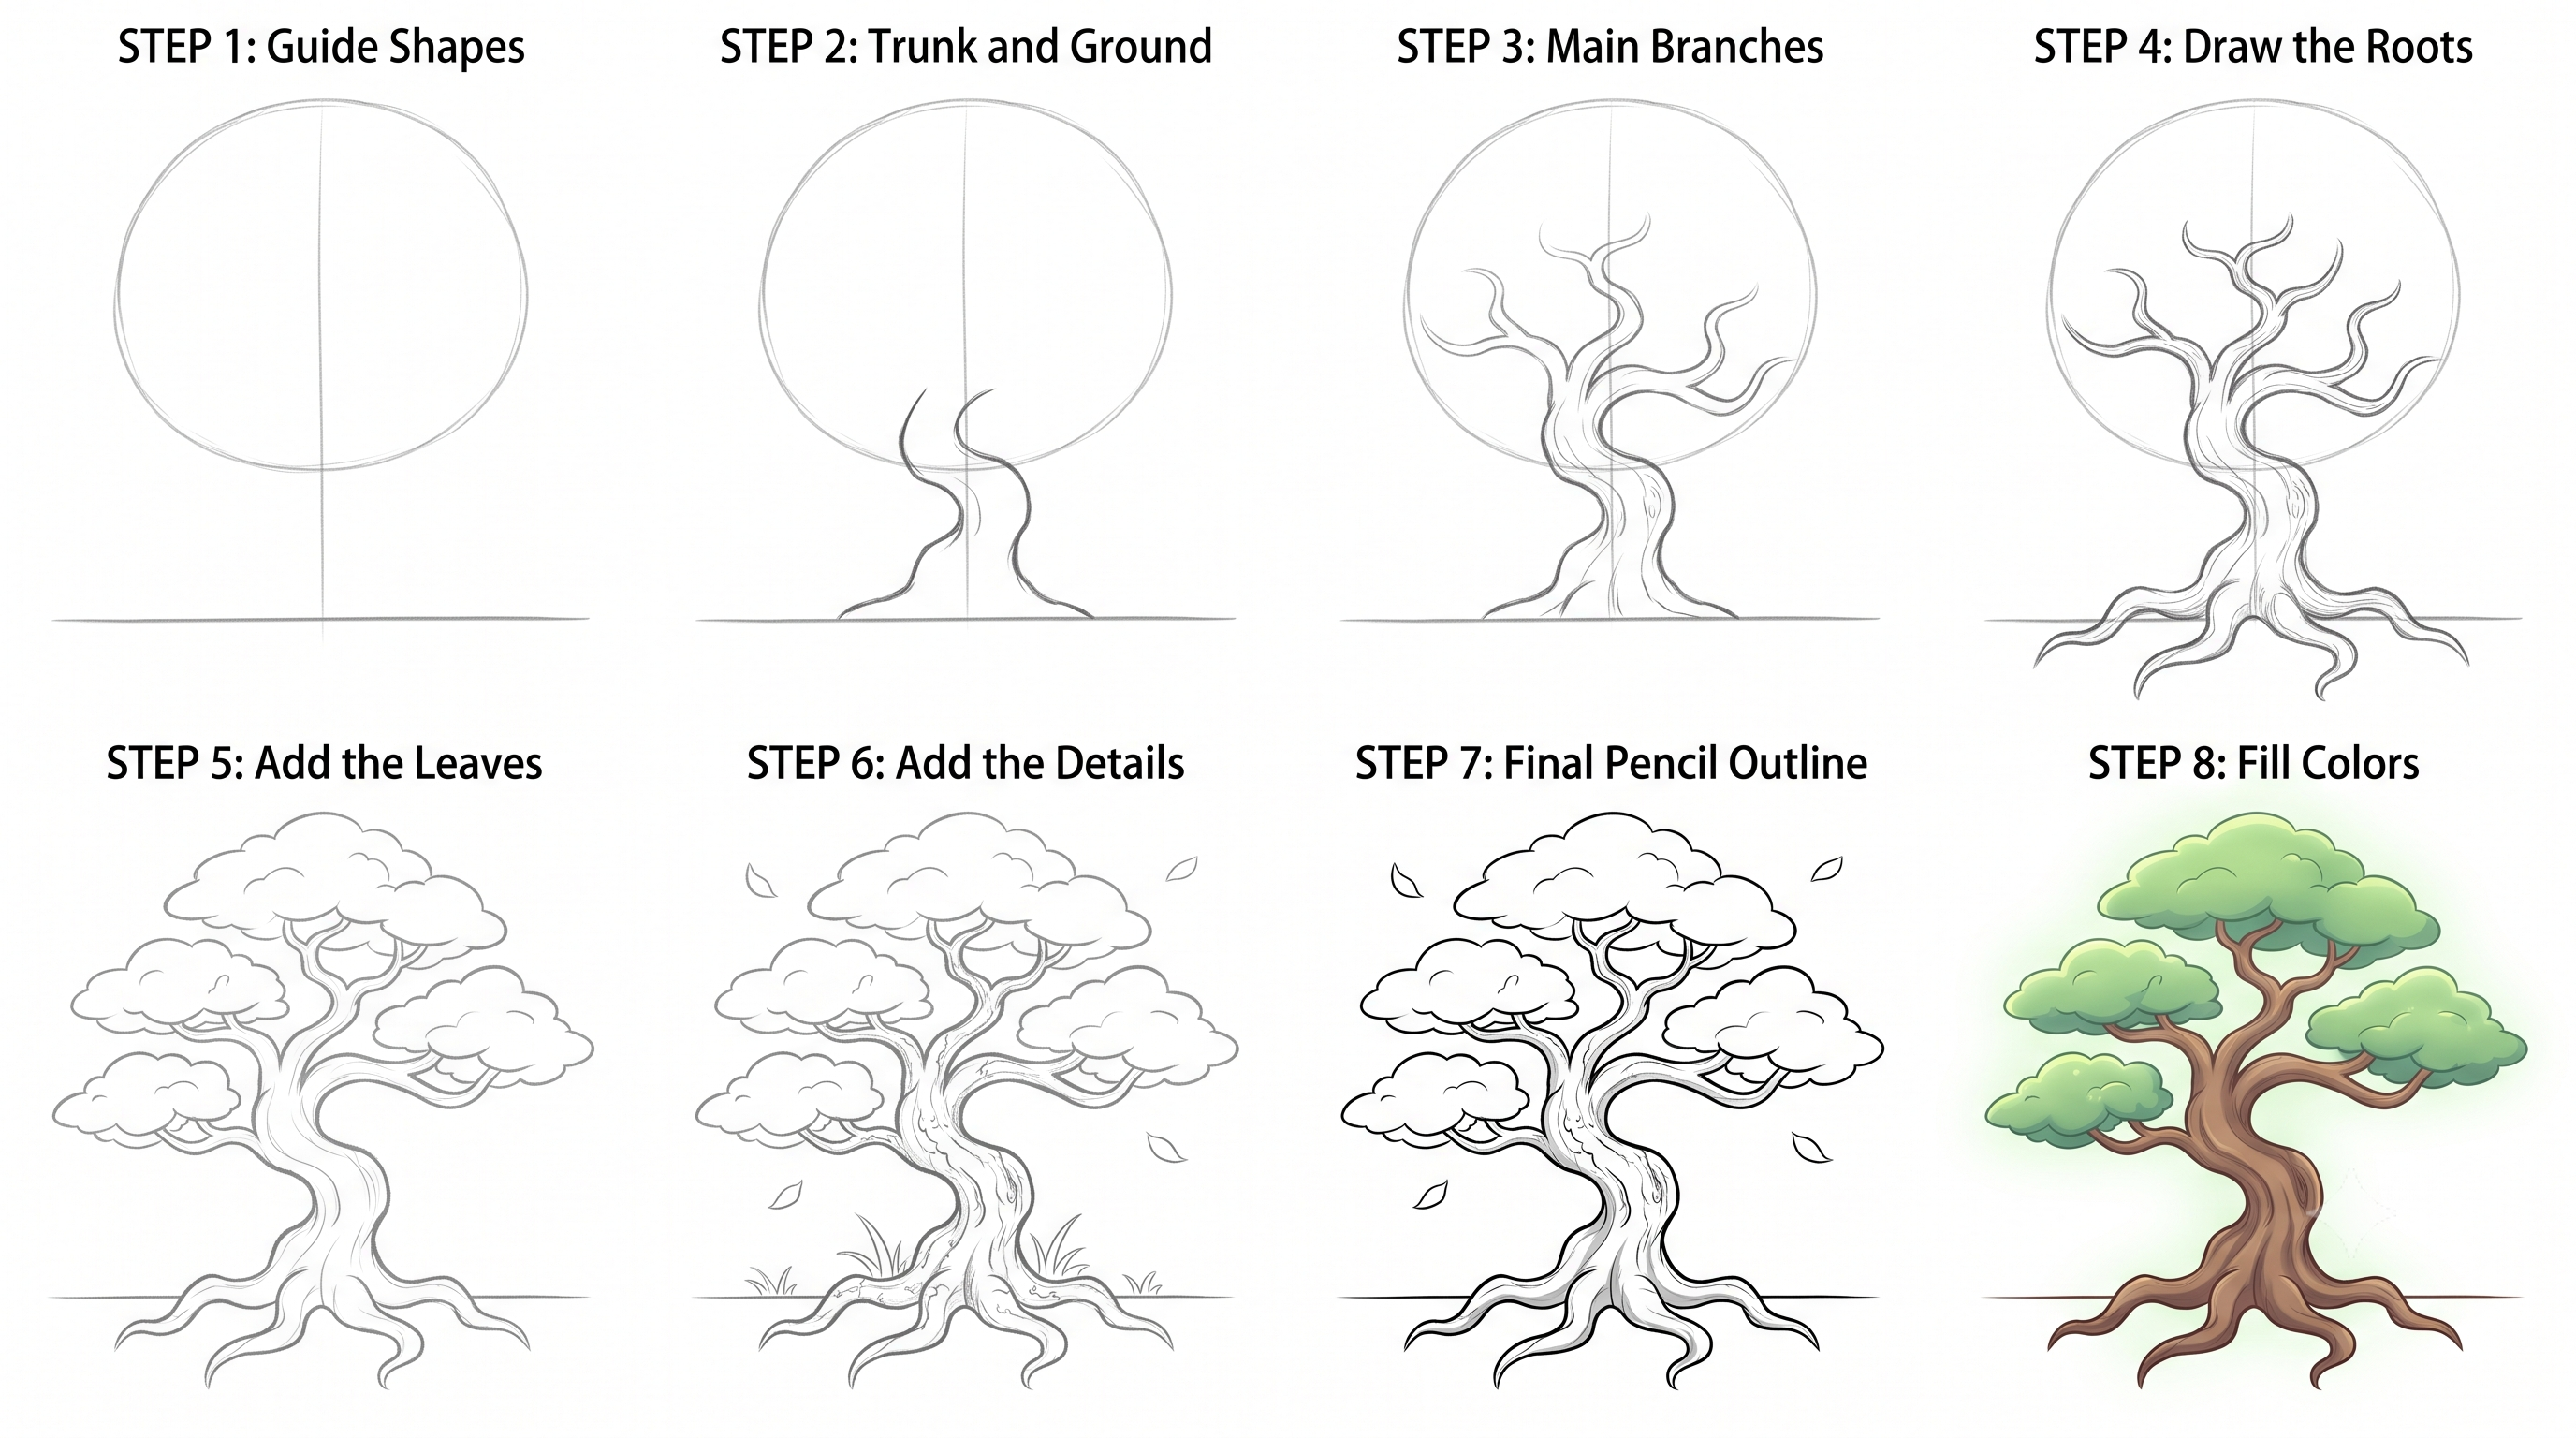
Follow each panel in sequence. Start with faint guideline circles and finish with saturated color.
Foundational Guide Shapes & Proportions
Begin by lightly sketching the primary construction lines and geometry (circles, ovals, or center axes). Keep your pencil strokes faint with an HB or 2H pencil as these scaffold marks will be erased later.
Core Form & Center Anatomy
Build upon your initial scaffold by establishing the central anchor point of the subject—such as the head/body segment, floral core, central trunk, or cranial curve.
Inner Contours & Secondary Shapes
Extend outward from the core to map secondary landmarks, such as antennae, inner petal layers, branch splits, or serpentine coils.
Upper Contours & Main Silhouette
Sketch the sweeping upper boundaries (forewings, crowning petals, high canopy foliage, or primary body arc). Establish clear flowing outer edges.
Lower Contours & Base Features
Balance the composition by adding lower elements (hindwings, descending foliage, root systems, or ground-level coiling curves). Check overall proportions.
Surface Textures & Anatomical Details
Incorporate distinctive organic patterns: wing venation, petal veins, bark grain, scale textures, or fur directions. Use slightly crisper line work.
Refined Pencil Outline & Clean Up
Carefully ink or pencil in the definitive contour lines using varying stroke weights. Once the ink or main lines are dry, gently erase the initial Step 1 guide lines.
Final Coloring, Shading & Highlights
Apply flat base tones followed by deeper shadow gradients and delicate highlights. Use colored pencils, markers, watercolours, or digital brushes to bring the plate to life.
Frequently Asked Questions
How do I draw a tree easy?
Sketch two upward lines for the trunk, branch outward at the top, and cap with layered cloud-like foliage.
How do I draw a Christmas tree?
Stack 3 to 4 overlapping triangles getting wider toward the bottom, then add a star and ornaments.
What is the easiest tree to draw?
The pine tree, because it is composed entirely of repeating triangular branch tiers.
Ready to Practice Offline?
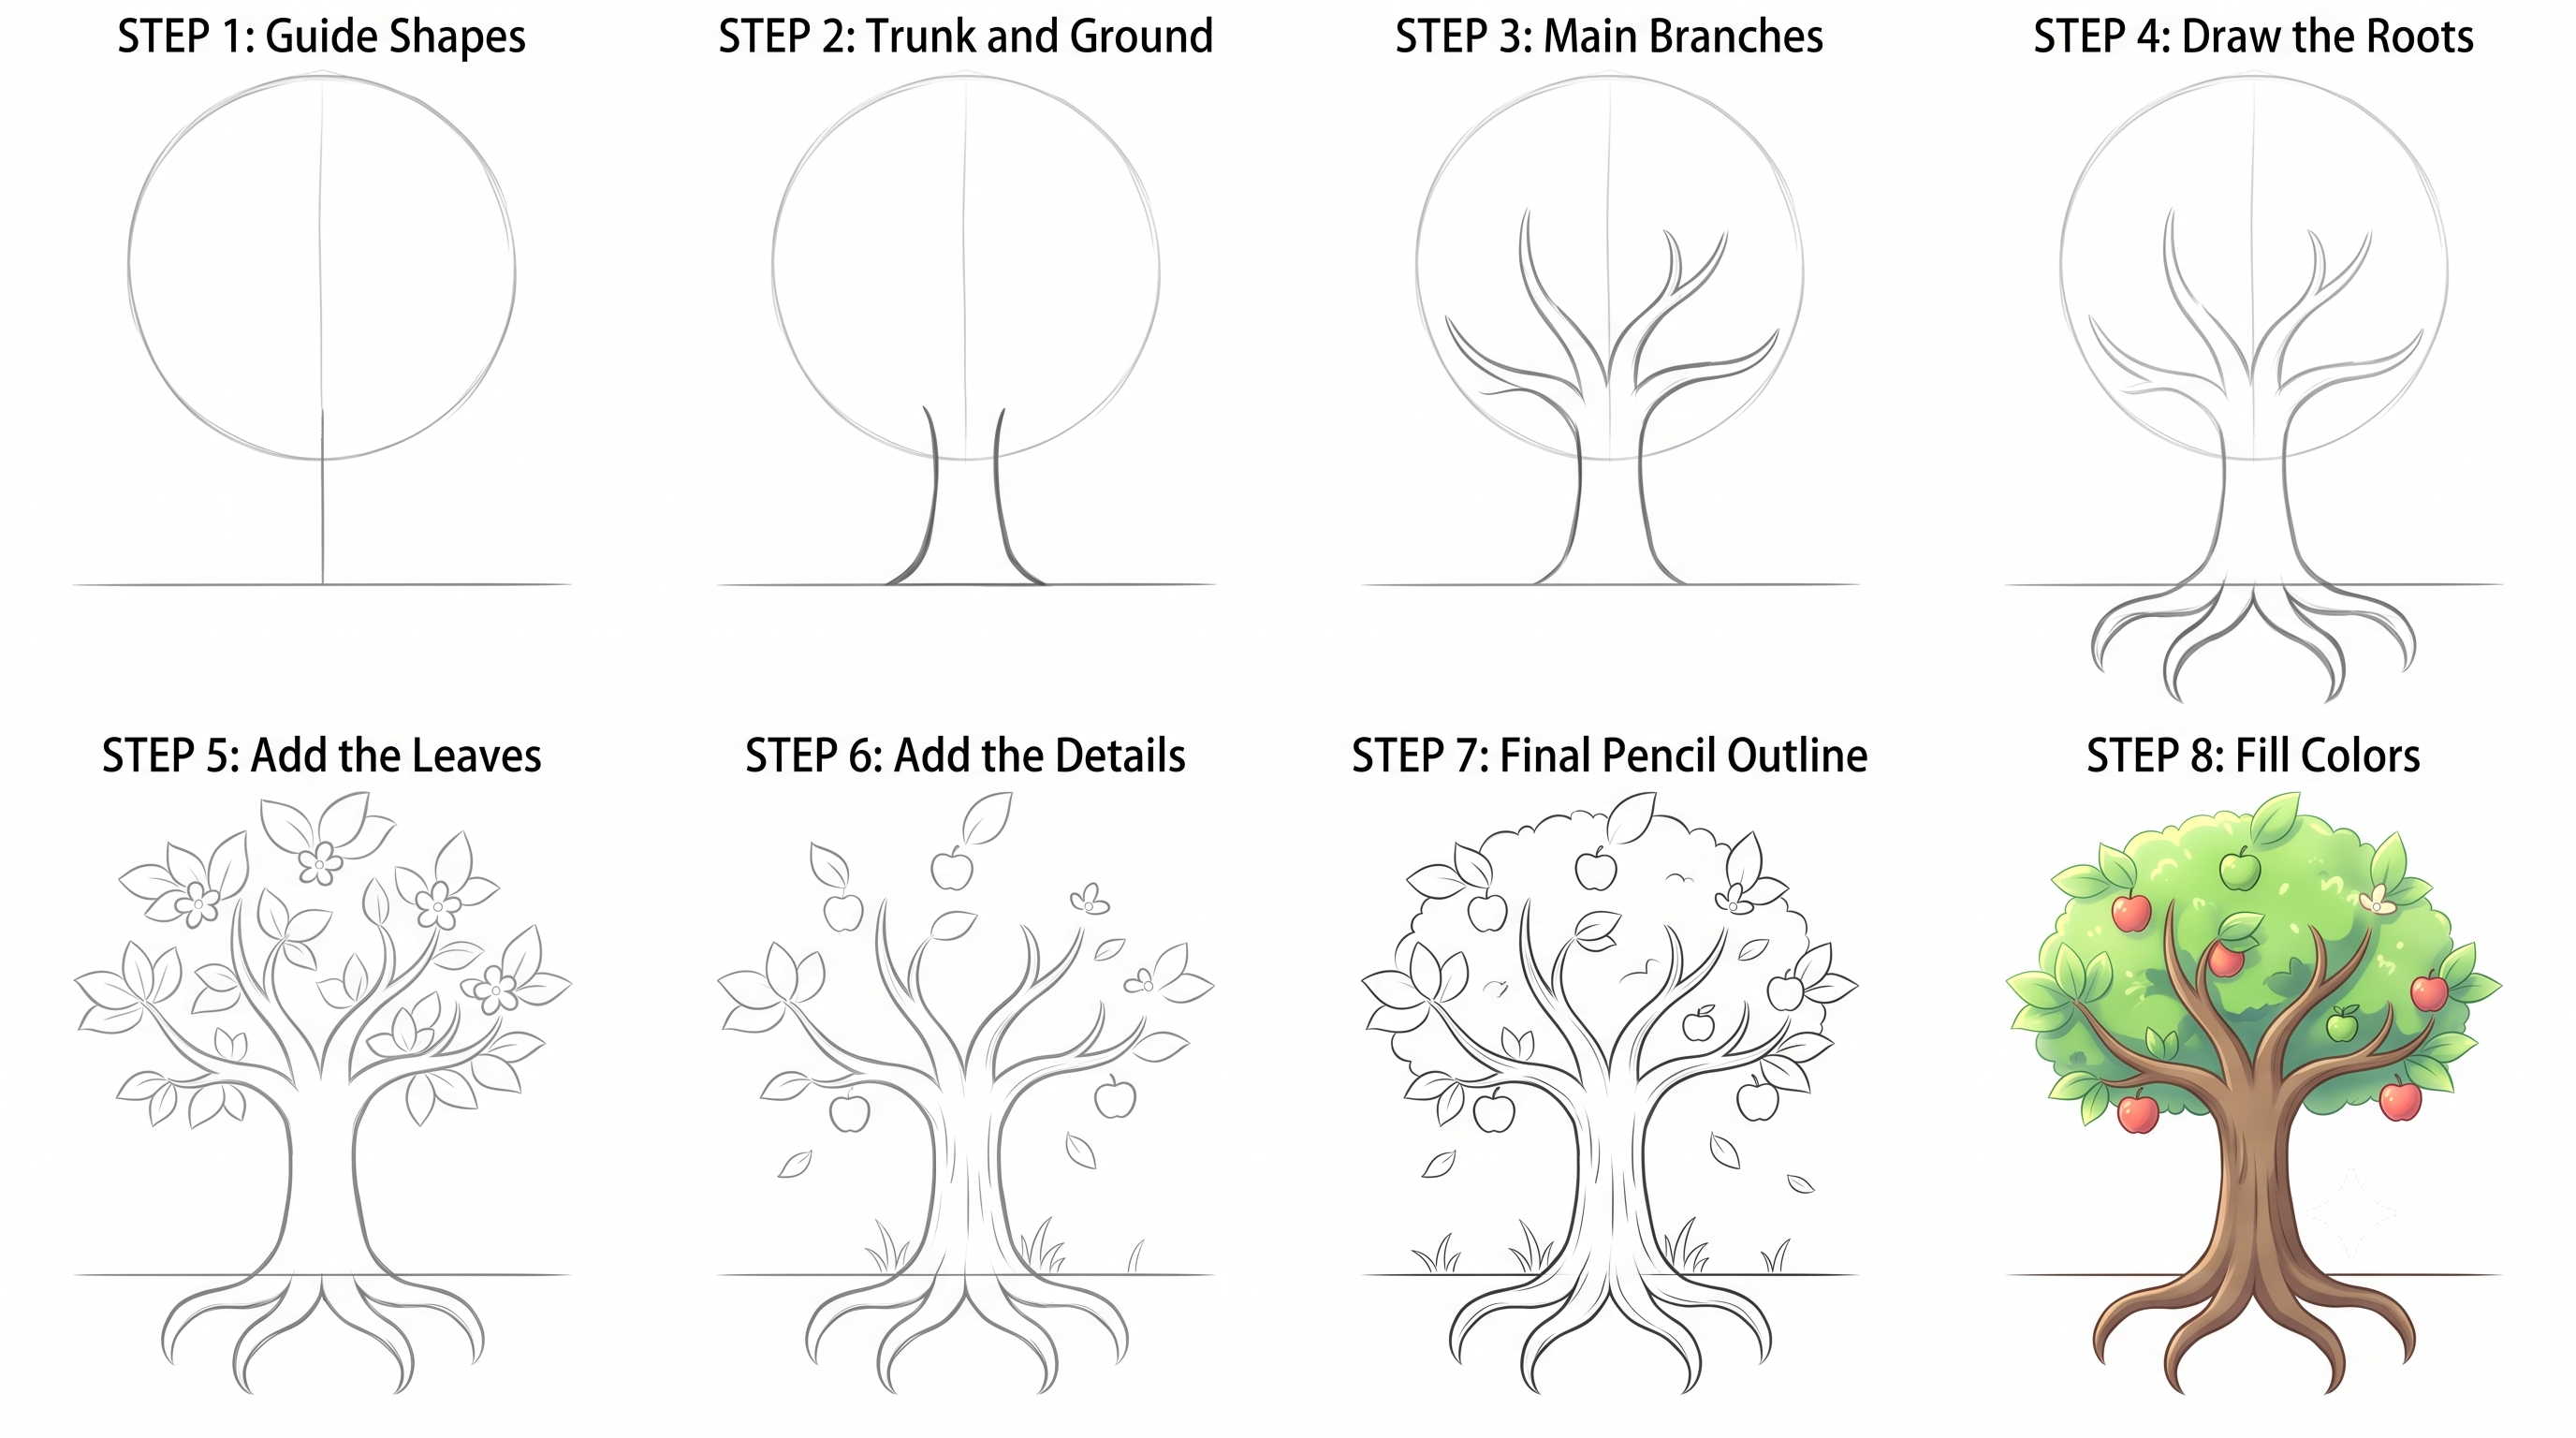
Print the tutorial sheet for Apple treec3 to sketch with pencil and paper anytime at home or school.
Popular Trees Tutorials to Draw
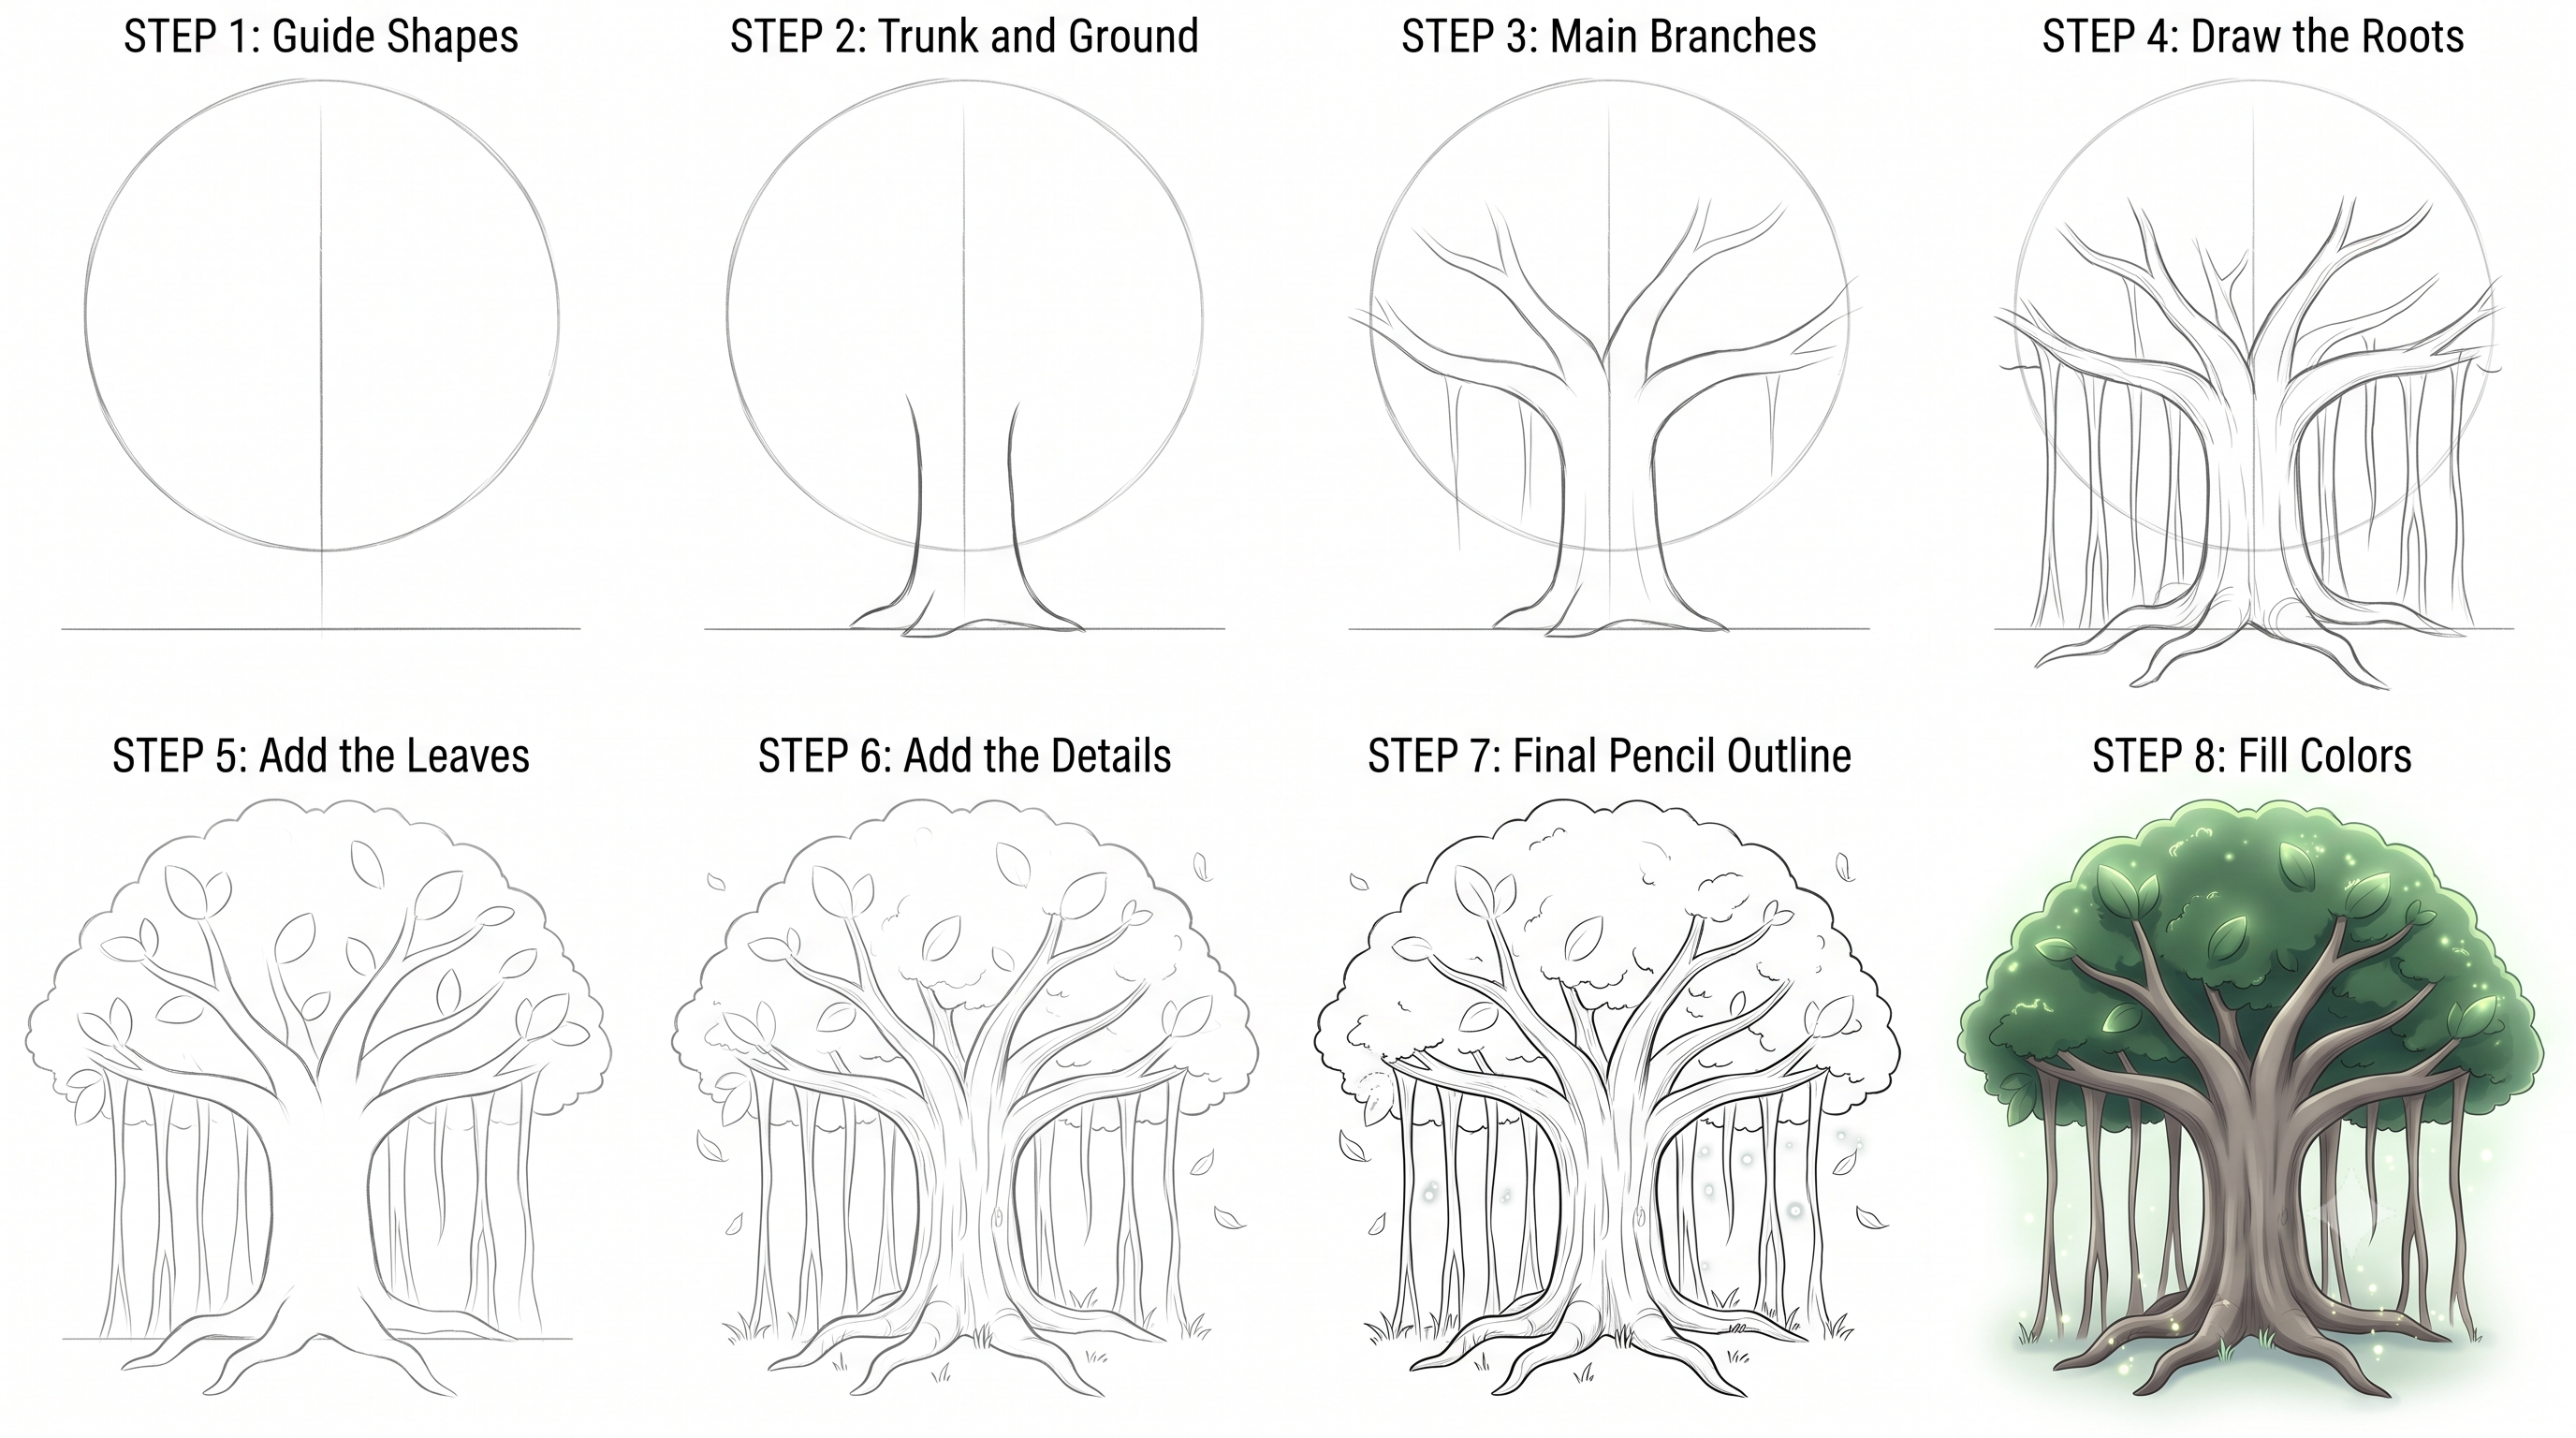
Banyan
tree
Baobab
tree
Bolsom 5
tree
Bonsai 1
tree
Bonsai
tree