
How to Draw Fuchsia
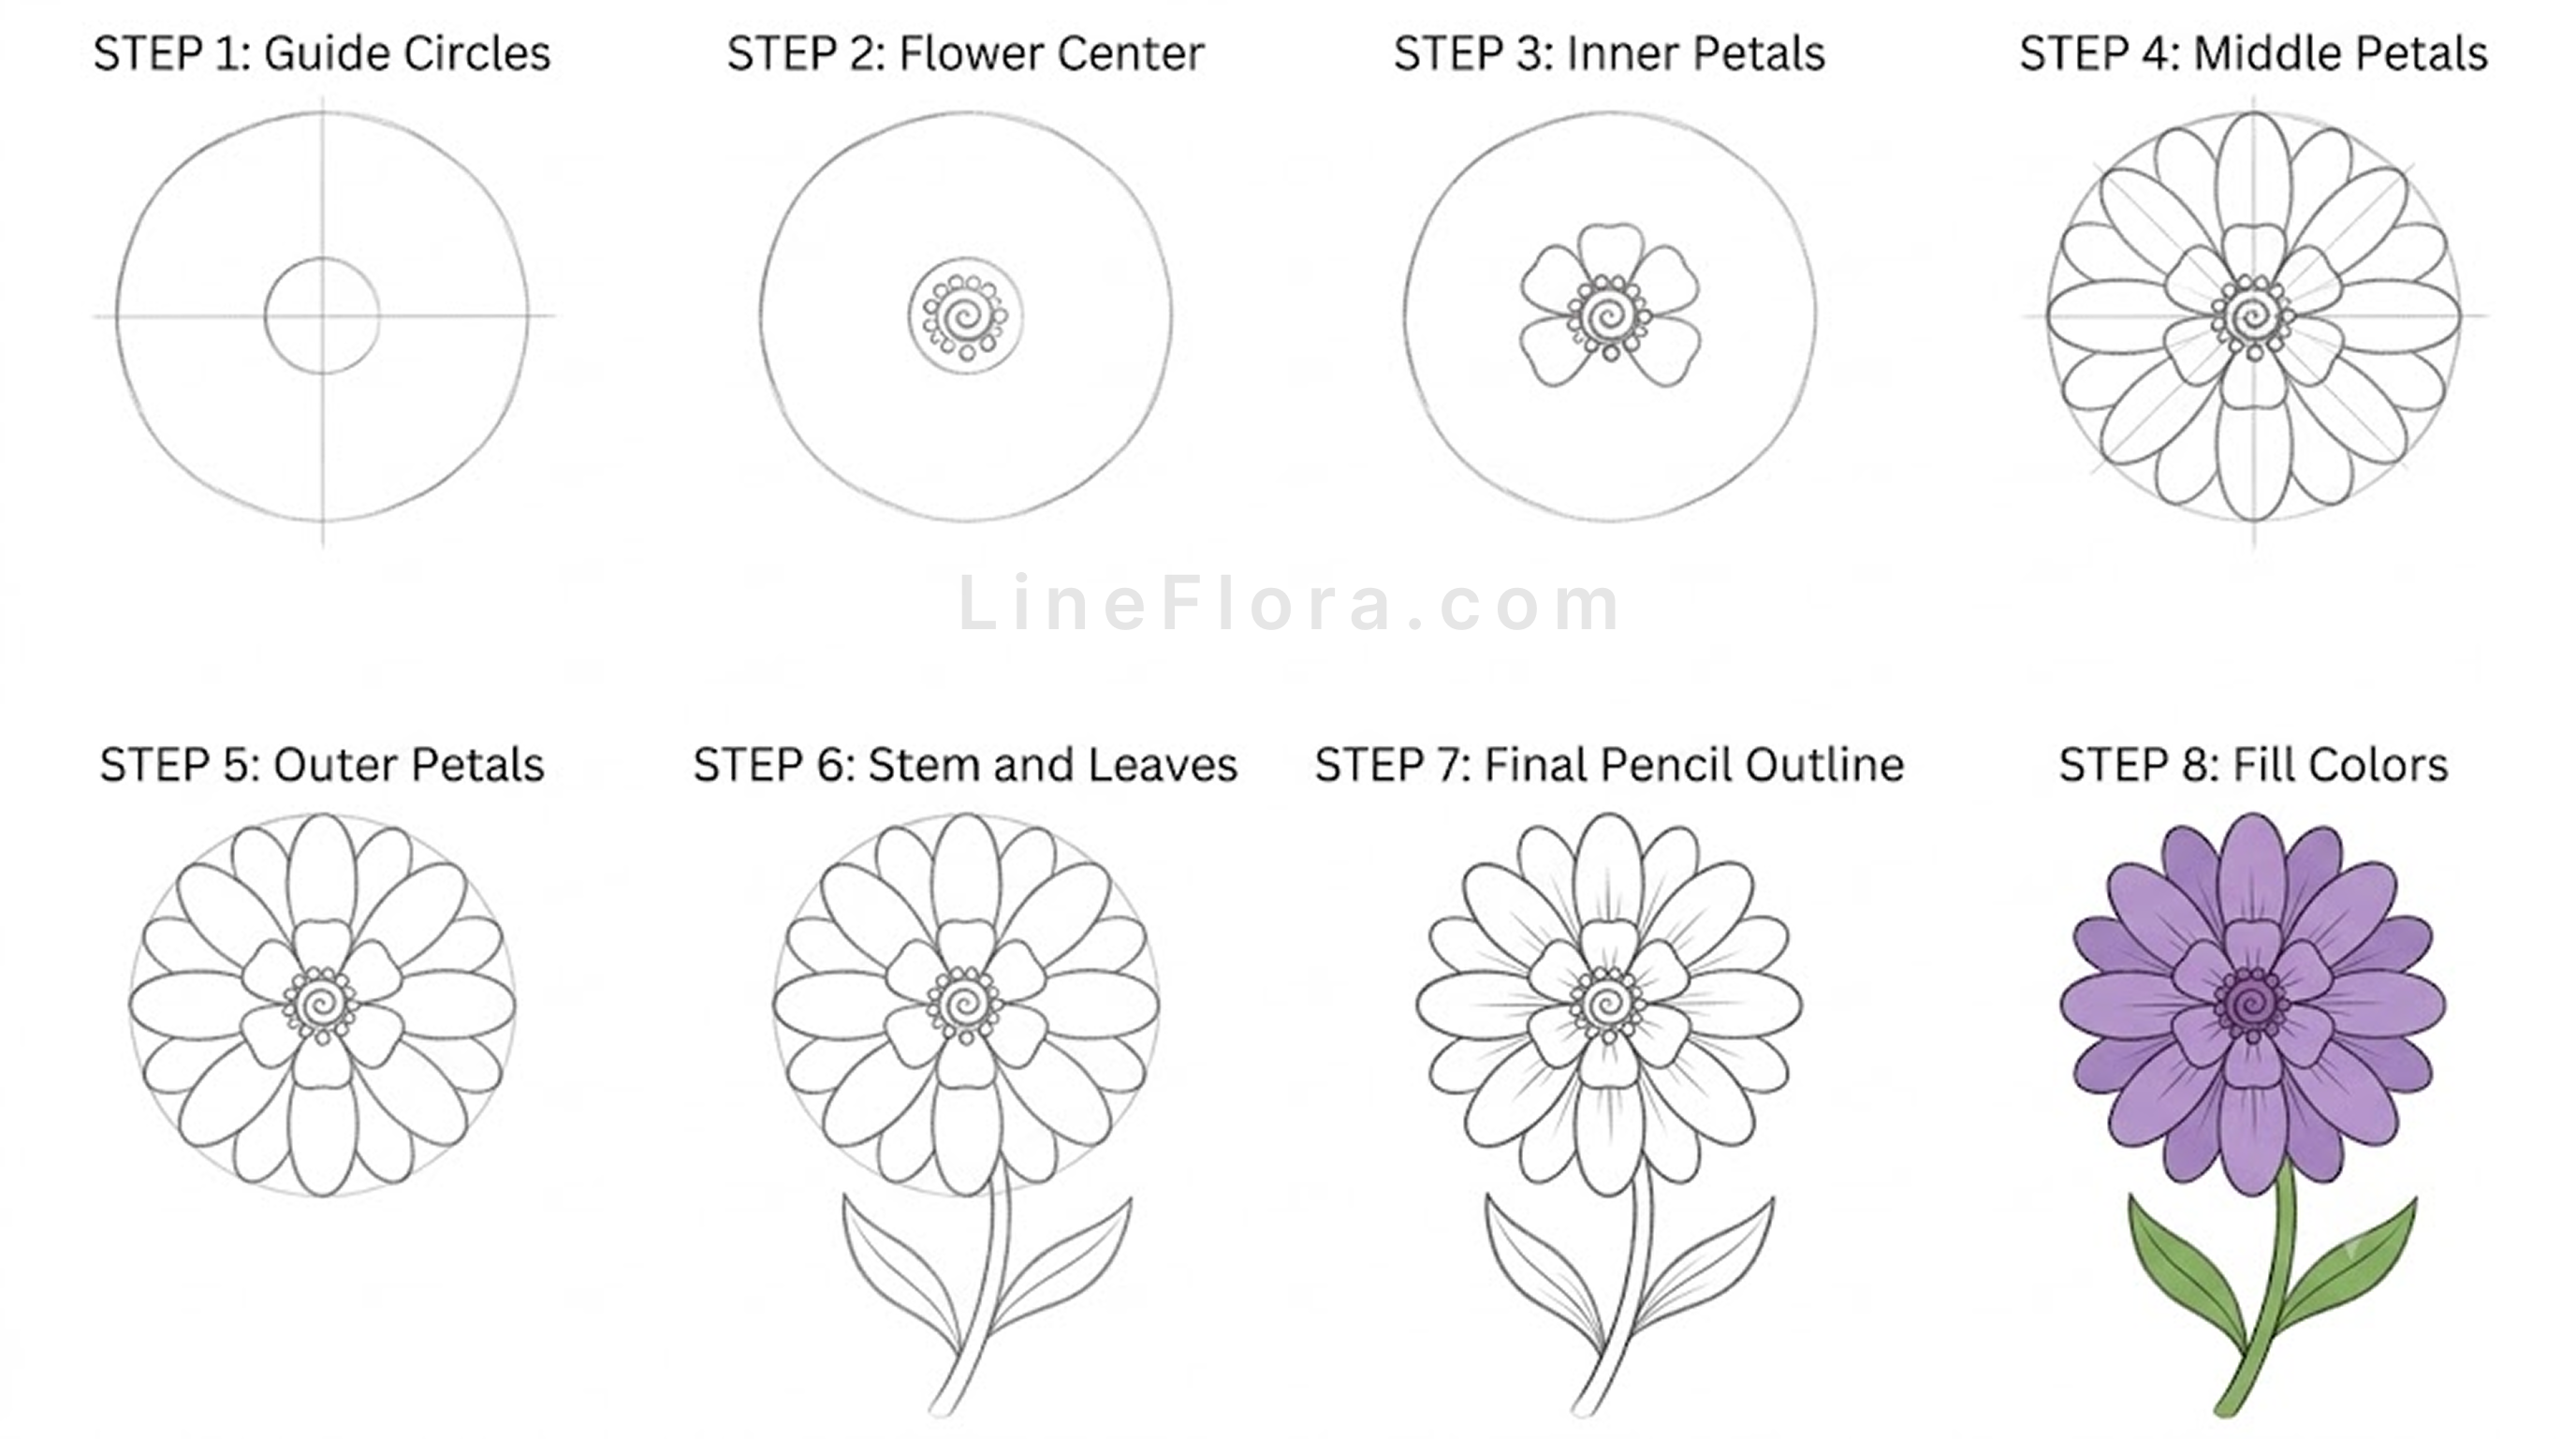
Learn how to draw Fuchsia with this free 8-step visual tutorial sheet. Complete progression from basic guide shapes to line work and coloring.
Want foundational tips, supply lists, and FAQs? Check out the complete Flower Drawing Easy – Simple Step by Step Tutorial.
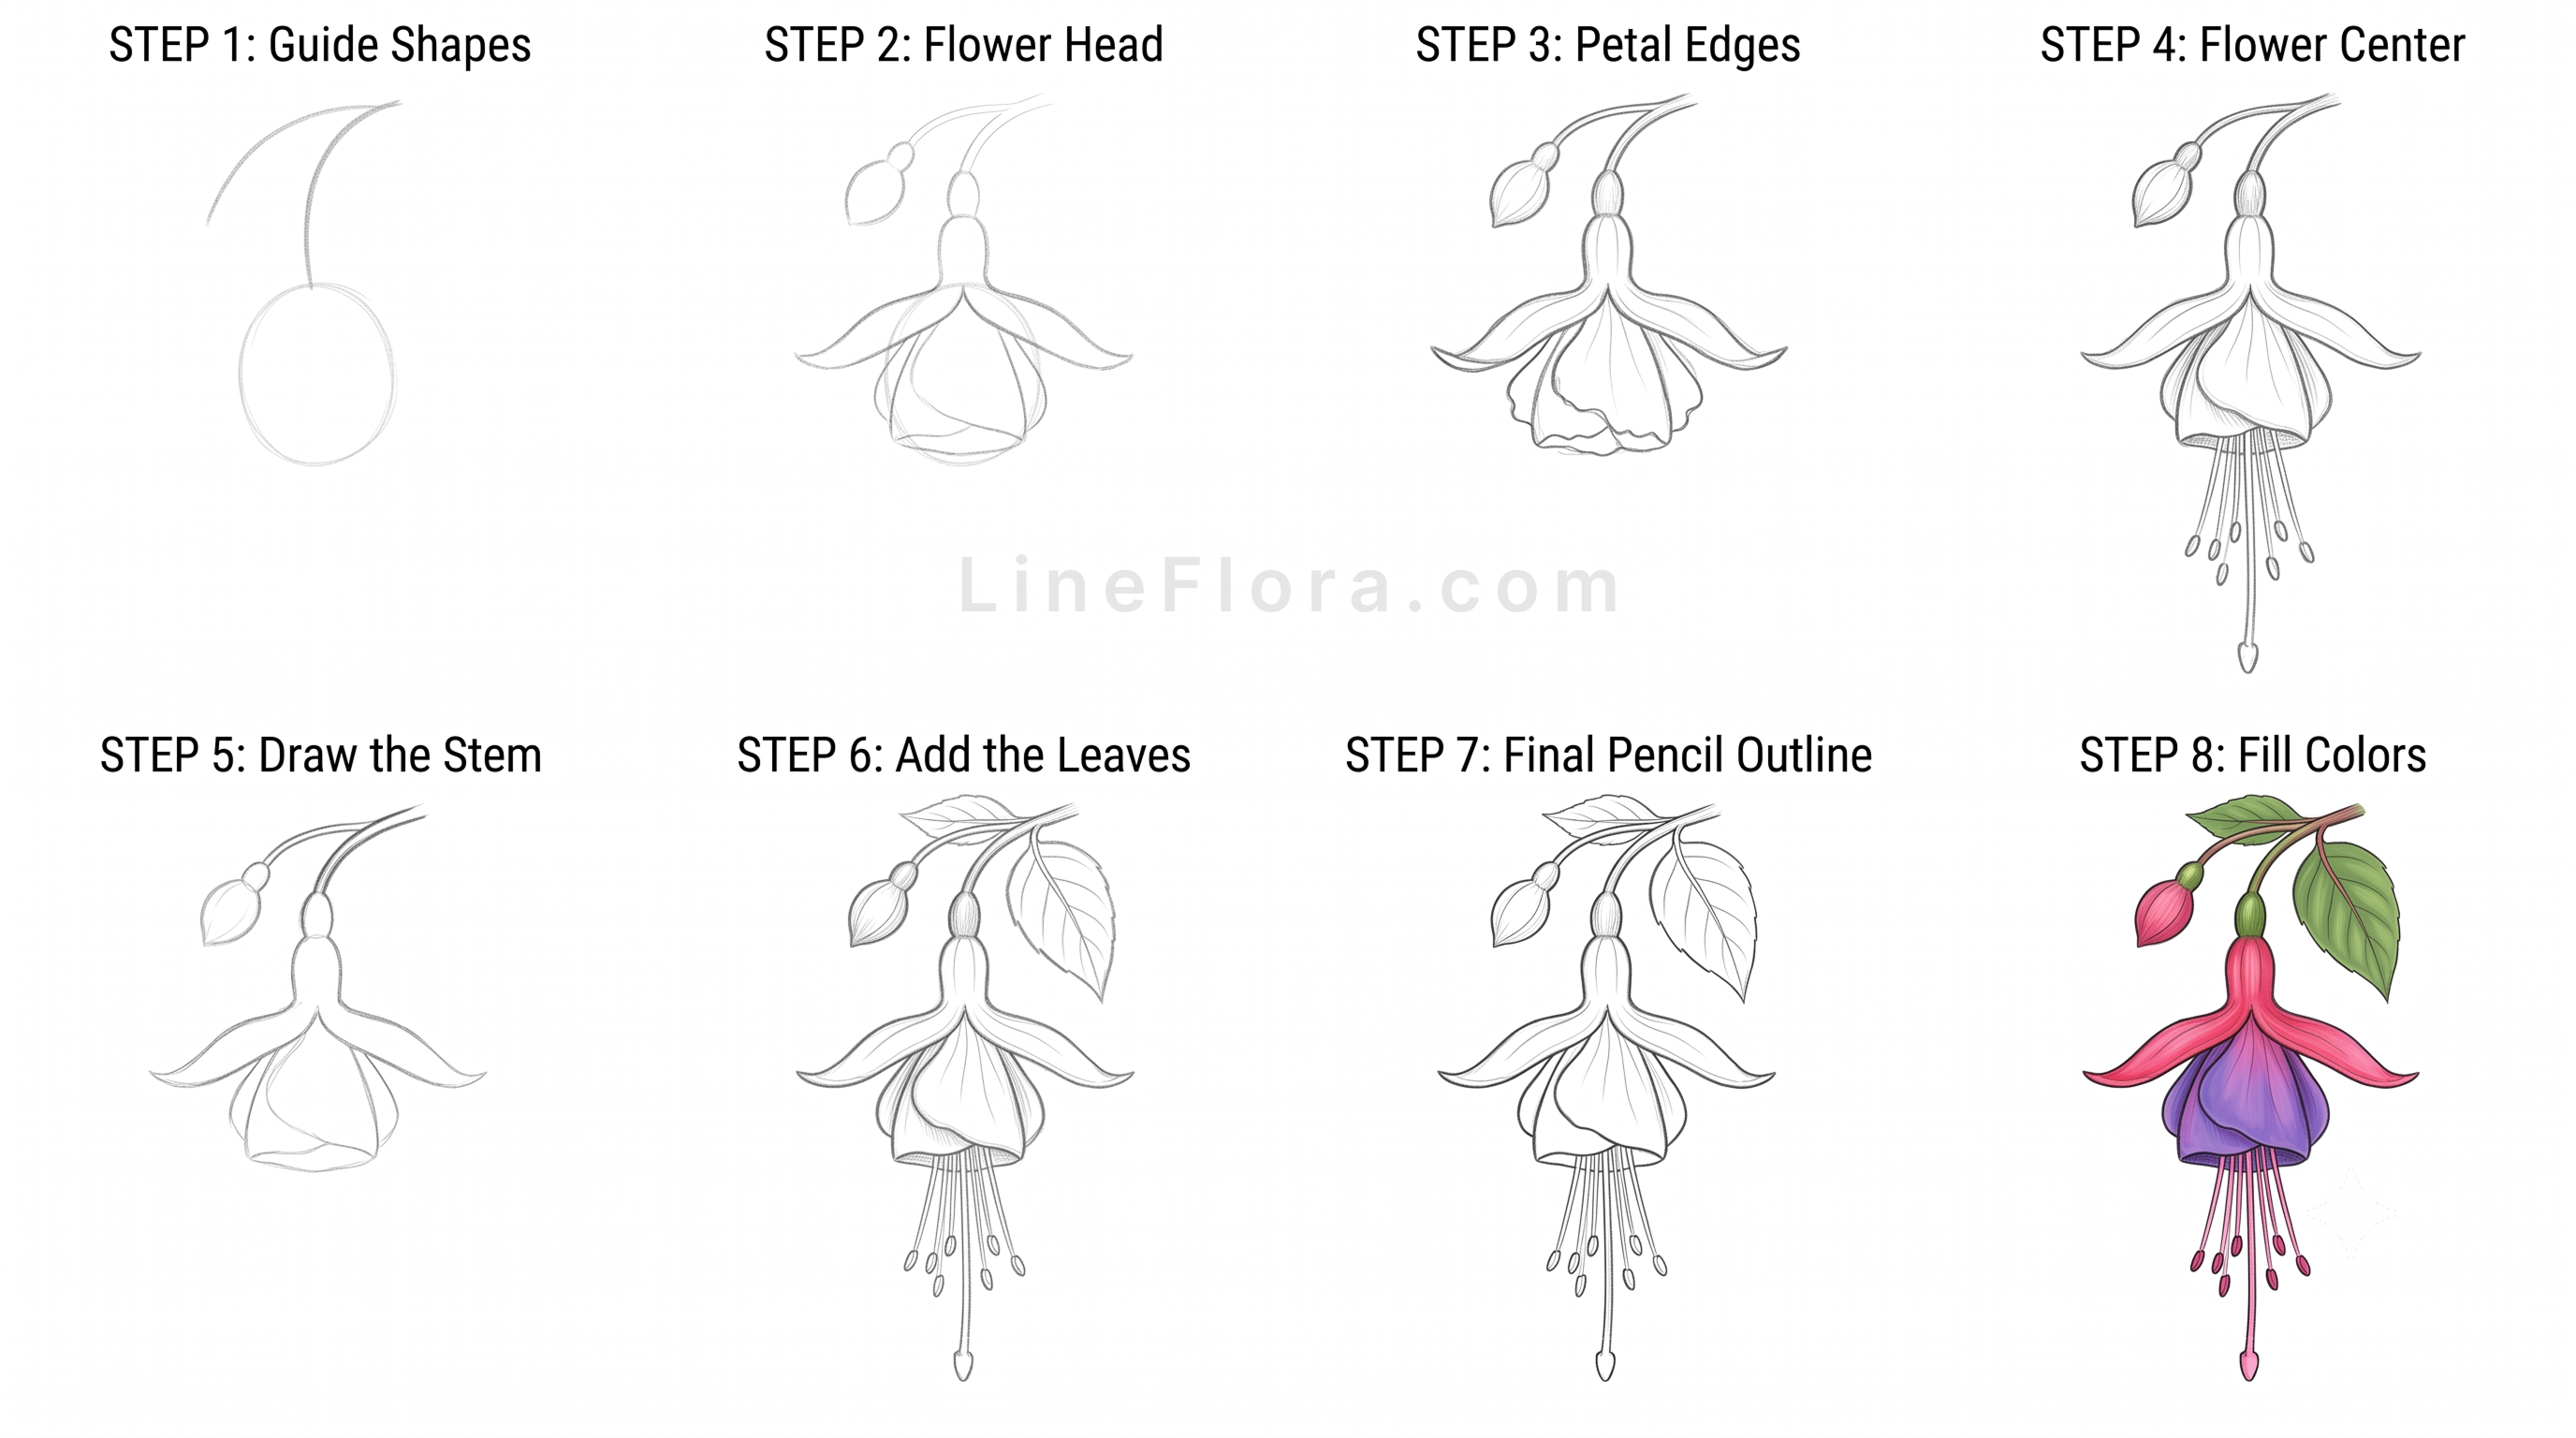
Tip: Click open high-res plate to view close-up strokes, line variations, and pencil guide erasures.
Step-by-Step Instructions
Follow each panel in sequence. Start with faint guideline circles and finish with saturated color.
Foundational Guide Shapes & Proportions
Begin by lightly sketching the primary construction lines and geometry (circles, ovals, or center axes). Keep your pencil strokes faint with an HB or 2H pencil as these scaffold marks will be erased later.
Core Form & Center Anatomy
Build upon your initial scaffold by establishing the central anchor point of the subject—such as the head/body segment, floral core, central trunk, or cranial curve.
Inner Contours & Secondary Shapes
Extend outward from the core to map secondary landmarks, such as antennae, inner petal layers, branch splits, or serpentine coils.
Upper Contours & Main Silhouette
Sketch the sweeping upper boundaries (forewings, crowning petals, high canopy foliage, or primary body arc). Establish clear flowing outer edges.
Lower Contours & Base Features
Balance the composition by adding lower elements (hindwings, descending foliage, root systems, or ground-level coiling curves). Check overall proportions.
Surface Textures & Anatomical Details
Incorporate distinctive organic patterns: wing venation, petal veins, bark grain, scale textures, or fur directions. Use slightly crisper line work.
Refined Pencil Outline & Clean Up
Carefully ink or pencil in the definitive contour lines using varying stroke weights. Once the ink or main lines are dry, gently erase the initial Step 1 guide lines.
Final Coloring, Shading & Highlights
Apply flat base tones followed by deeper shadow gradients and delicate highlights. Use colored pencils, markers, watercolours, or digital brushes to bring the plate to life.
Frequently Asked Questions
How do I start flower drawing?
Begin with a circle in the middle and build petals around it with gentle curved strokes.
What is the easiest flower to draw?
A simple daisy or tulip with rounded petals is the easiest flower to start with.
Can I make my flower drawing easy for kids?
Yes! Use large, simple petal shapes and skip fine internal veins until they feel confident.
Ready to Practice Offline?
Print the tutorial sheet for Fuchsia to sketch with pencil and paper anytime at home or school.
More Flowers Tutorials
Azalea
flower
Basic Flower
flower
Basic Jasmine
flower
Basic Lavender
flower